
There’s something irresistibly comforting about baking, and sharing a treat like this one with family and friends just makes it all the better. As we dive into the spooky spirit of Halloween, I love exploring recipes that not only taste great but also bring a smile—or perhaps a delightful shudder—to the faces of those we serve. The Bloodshot Eyeball Cake Pops capture that perfect balance of fun and flavor, making them an ideal treat for any Halloween gathering.
Prepare to indulge in a cake pop that looks as thrilling as it tastes. This delightful recipe incorporates a box cake mix, which creates a moist and sweet base, and complements it with creamy frosting to bind the flavors together. We’ll coat these eye-catching pops with shiny white chocolate melting wafers, then adorn them with colorful blue or green candy melts for the iris. The finishing touches of black and red gel icing transform these sweets into lifelike eyeballs, complete with eerie veins—a flavor profile packed with nostalgia and joy.
Now, you may be wondering how all of this comes together in such a fun, spooky treat. It’s remarkably easy! You’ll start by crumbling the baked cake, mixing it with frosting until it turns into a moldable dough. After rolling the mixture into playful eyeball shapes and inserting cake pop sticks, a quick freeze helps them firm up. Dipping them into melted white chocolate for a smooth coat is the next step, followed by carefully adding the candy melt iris and piping red veins to give your pops their unsettling yet appealing look. It’s simple enough to make that anyone can enjoy crafting these together!
These cake pops are splendid for Halloween parties, children’s get-togethers, or even casual family nights. When the autumn chill sets in, there’s nothing like gathering together to whip up delightful treats that thrill both the eye and the taste buds.
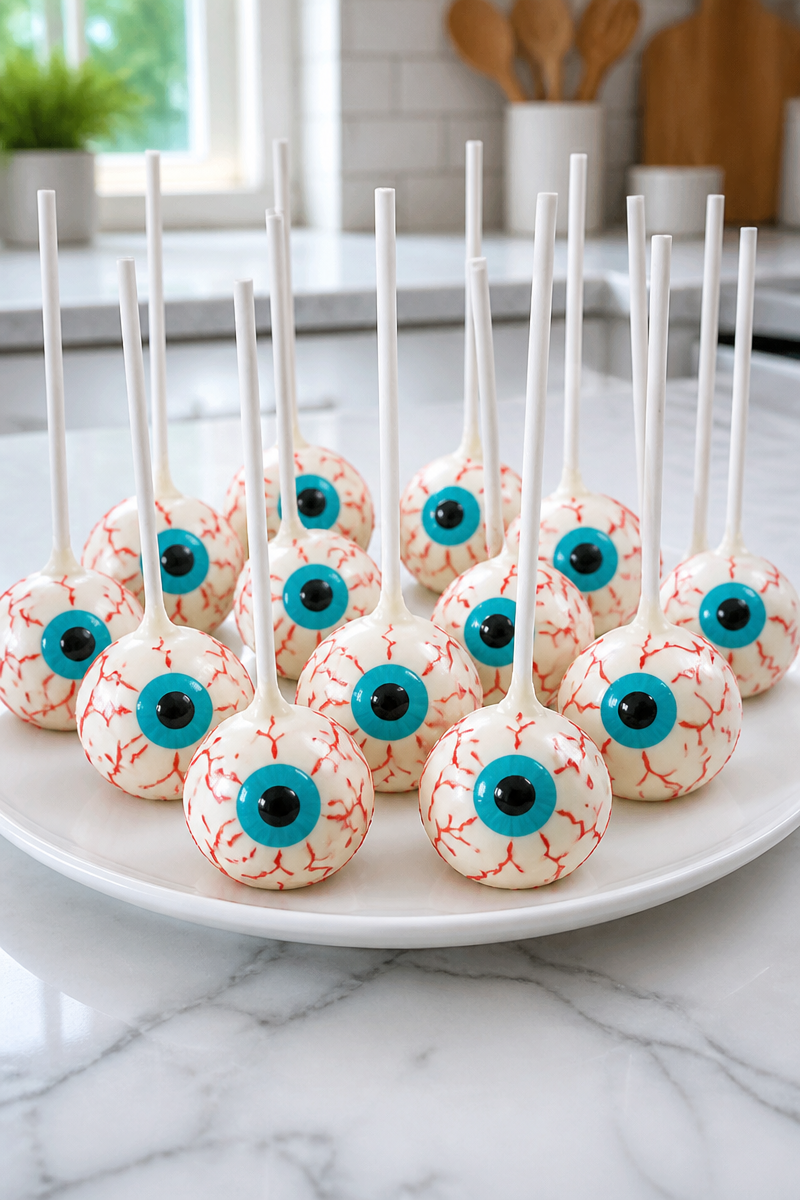
Why You’ll Love This Bloodshot Eyeball Cake Pop Halloween
- Perfect for Halloween: They add a fun, thematic treat to any gathering.
- Easy to Make: With minimal steps and simple ingredients, anyone can whip these up.
- Customizable: Feel free to switch colors or add extra decorations for your special touch.
- Kid-Friendly: Children will be excited to help make and decorate these spooky snacks.
- Great for Sharing: These cake pops are fun to present and even more fun to consume together.
Cake Mix Tips
When working with cake mix, it’s beneficial to choose a mix that fits the flavor profile you want. Consider selecting a chocolate mix for a richer taste or going with vanilla if you prefer a lighter cake. Reading the box instructions carefully will guide you in baking it to moist perfection. Don’t forget to let it cool completely before crumbling, as this ensures the cake maintains the right texture for mixing with frosting.
Options for Substitutions
- Cake Mix: You can use a gluten-free cake mix if necessary.
- Frosting: Swap with cream cheese frosting for a tangy twist.
- White Chocolate Melting Wafers: Dark chocolate can provide a richer flavor.
- Candy Melts: Use different colors for creative variations like pink or purple.
- Gel Icing: Consider edible glitter in place of gel icing for a sparkly effect.
- Cake Pop Sticks: You can substitute with sturdy lollipop sticks or even pretzel sticks for a fun crunch.
Watch Out for These Mistakes
Creating the perfect Bloodshot Eyeball Cake Pops can be a straightforward process, but there are some common pitfalls to avoid. Firstly, ensure that the cake is cooled completely before crumbling it. If it’s still warm, the added frosting can get too soft, making the dough hard to shape.
When rolling the cake mixture into balls, don’t skip the freezing step. It’s essential for keeping the shape during the chocolate coating. If they’re too soft, the balls may fall apart when you dip them in the melted chocolate.
Another mistake to avoid is not fully coating the cake balls in chocolate. A thin layer won’t hold up well and may crack when it’s handled. Lastly, don’t rush the setting time after decorating. Allowing the gel icing to set properly is crucial; if you try to move the pops too soon, all your hard work could smudge.

What to Serve With Bloodshot Eyeball Cake Pop Halloween?
These bloodshot eyeball cake pops are an impressive treat on their own, but they can be paired nicely with some other spooky favorites. Consider serving them alongside a pumpkin spice dip with apple slices for a crunchy contrast. Another option is a simple charcuterie board filled with harvest-themed snacks like cheese, crackers, and seasonal fruits. For a festive drink, a batch of warm apple cider garnished with cinnamon sticks will complement the sweet and slightly spooky dessert well.
Storage Instructions
Store your cake pops in an airtight container in the refrigerator for up to 5 days. Be sure to keep them separated with parchment paper if stacking them to prevent sticking.
If you want to preserve them for a longer time, freeze the cake pops. They can last about 2 to 3 months in the freezer. To reheat, simply take them out and let them thaw in the fridge for a few hours before serving.
Recipe Info
- Preparation Time: 35 minutes
- Cooking Time: 30 minutes
- Total Time: 1 hour 5 minutes
- Level of Difficulty: Easy
- Servings: Approximately 12-15 cake pops
Estimated Nutrition
Estimated nutrition for the whole recipe (without optional ingredients):
- Calories: 800-1000
- Protein: 10-15g
- Fat: 40-50g
- Carbohydrates: 100-120g
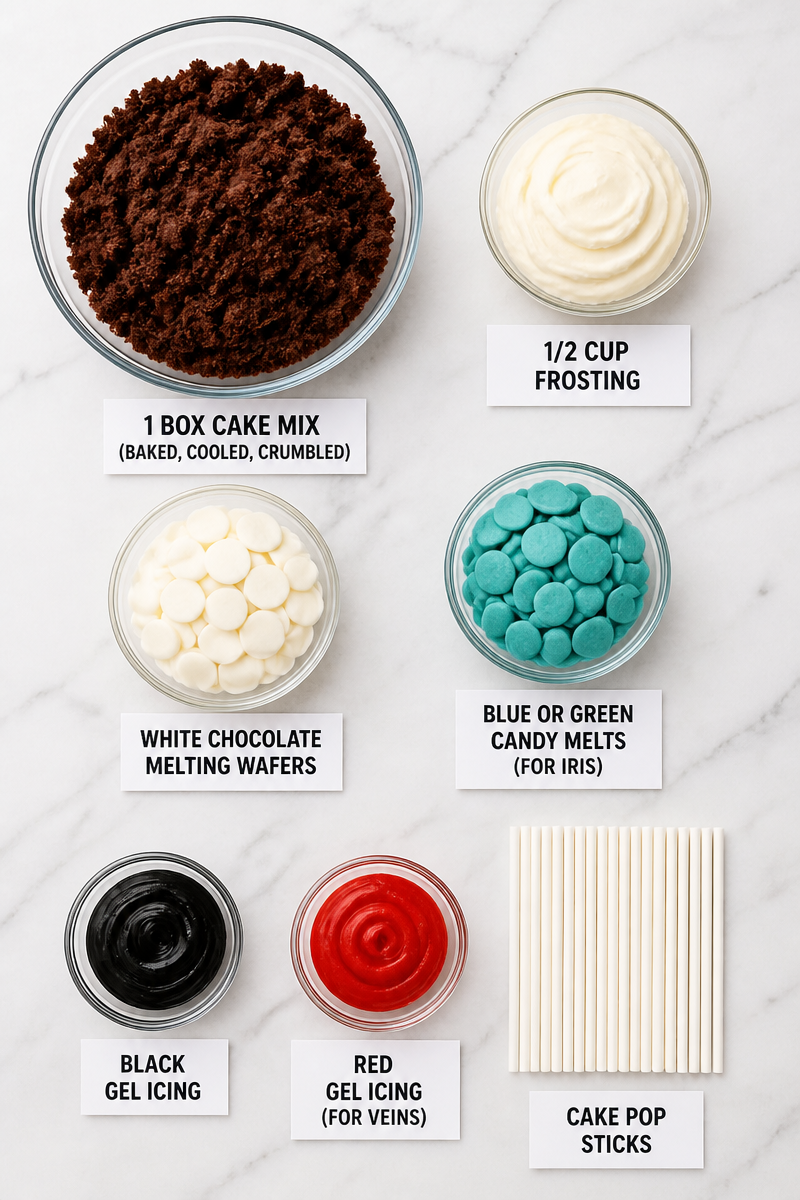
Ingredients
- 1 box cake mix (baked, cooled, crumbled)
- 1/2 cup frosting
- White chocolate melting wafers
- Blue or green candy melts (for iris)
- Black gel icing
- Red gel icing (for veins)
- Cake pop sticks
Step-by-Step Instructions
Step 1: Crumble the Cake
Once your cake has cooled completely, crumble it into a large mixing bowl. Use your fingers to break it apart gently; you want it to resemble coarse crumbs without large chunks.
Step 2: Mix with Frosting
Add 1/2 cup of frosting into the bowl with the crumbled cake. Mix well, using your hands or a spatula until you achieve a moldable dough consistency. If it feels too dry, add a little more frosting until it’s easier to work with.
Step 3: Shape Into Balls
Now, take small portions of the dough and roll them into balls. Once you have your balls formed, insert a cake pop stick into each. Place them on a baking sheet lined with parchment paper and freeze for about 30 minutes. This helps set the shape.
Step 4: Dip in White Chocolate
While the cake balls are freezing, melt your white chocolate melting wafers according to package instructions. Once melted, dip each cake ball fully into the chocolate. Allow the excess to drip off before setting them upright in a container to harden.
Step 5: Add the Iris and Pupil
Once the white chocolate has set, melt a small amount of your blue or green candy melts. Use a toothpick to dot a small amount in the center of each cake pop to create an iris. Then, add a tiny black dot in the middle for the pupil.
Step 6: Create the Veins
Finally, use the red gel icing to pipe thin, spider-web-like veins radiating out from the center. This gives your cake pops the final creepy touch. Let them set completely before serving, and get ready to wow your guests with this delightfully gross Halloween treat.
In conclusion, making Bloodshot Eyeball Cake Pops is a fun and enjoyable activity perfect for Halloween. They are a great way to get everyone involved in the kitchen and create delicious memories. I encourage you to try this recipe, share it with your family, and let me know how your spooky treats turn out! Happy baking!
Print
Bloodshot Eyeball Cake Pops
- Prep Time: 35 minutes
- Cook Time: 30 minutes
- Total Time: 65 minutes
- Yield: 12-15 cake pops 1x
- Category: Dessert
- Method: Baking
- Cuisine: American
- Diet: Vegetarian
Description
These spooky Bloodshot Eyeball Cake Pops are perfect for Halloween, combining fun shapes with delicious flavors. Easy to make and customizable, they’re great for parties or family gatherings.
Ingredients
- 1 box cake mix (baked, cooled, crumbled)
- 1/2 cup frosting
- White chocolate melting wafers
- Blue or green candy melts (for iris)
- Black gel icing
- Red gel icing (for veins)
- Cake pop sticks
Instructions
- Crumble the cake into a large mixing bowl after it has cooled completely.
- Mix the crumbled cake with 1/2 cup of frosting until a moldable dough forms.
- Shape the mixture into small balls and insert cake pop sticks.
- Freeze the cake balls on a baking sheet for about 30 minutes.
- Dip each cake ball into melted white chocolate and allow excess to drip off.
- Add small dots of blue or green candy melts in the center for the iris.
- Create spider-web-like veins using red gel icing.
Notes
Feel free to customize the colors and decorations. Ensure the cake is cooled completely before crumbling for the best texture.
Nutrition
- Serving Size: 1 cake pop
- Calories: 800
- Sugar: 60g
- Sodium: 500mg
- Fat: 42g
- Saturated Fat: 24g
- Unsaturated Fat: 15g
- Trans Fat: 0g
- Carbohydrates: 110g
- Fiber: 3g
- Protein: 12g
- Cholesterol: 50mg
