
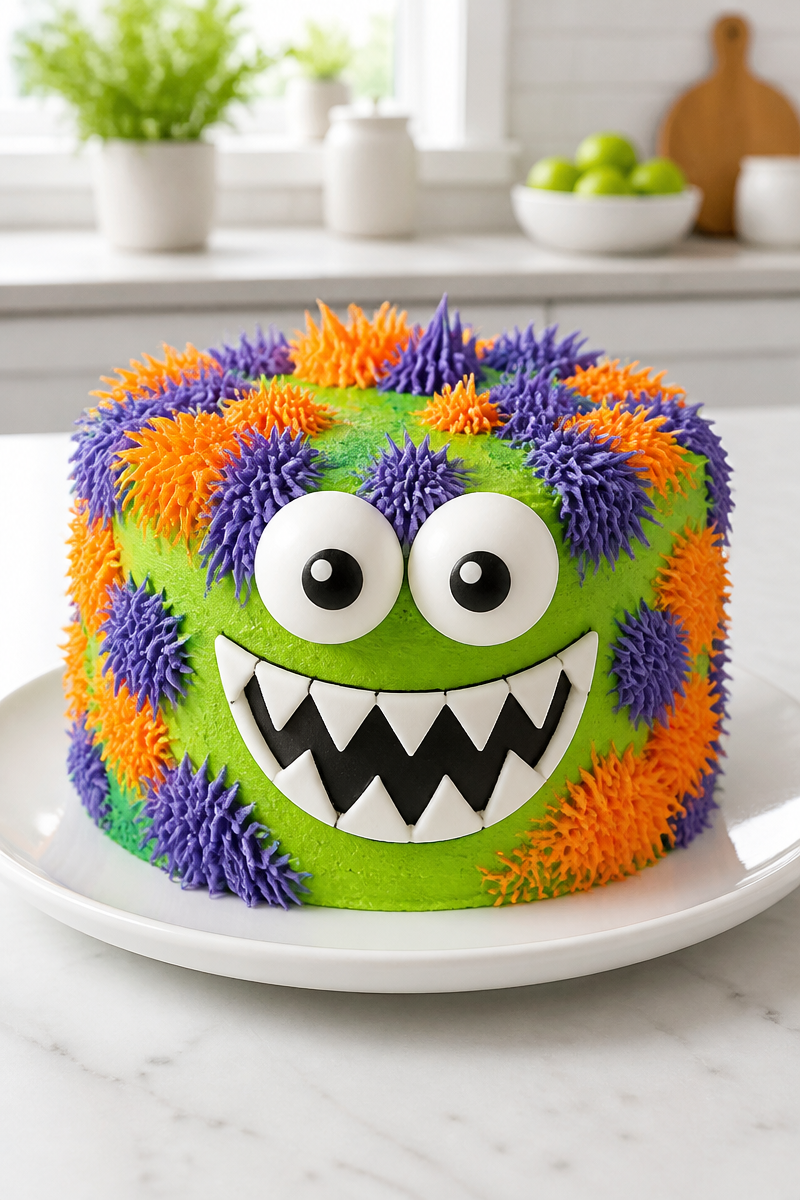
This Funny Monster Face Halloween Cake is pure party joy. I love how it brings a playful, spooky look to the table without feeling fussy or too hard to make. In my view, it is the kind of dessert that makes both kids and grown-ups smile before the first slice is even cut.
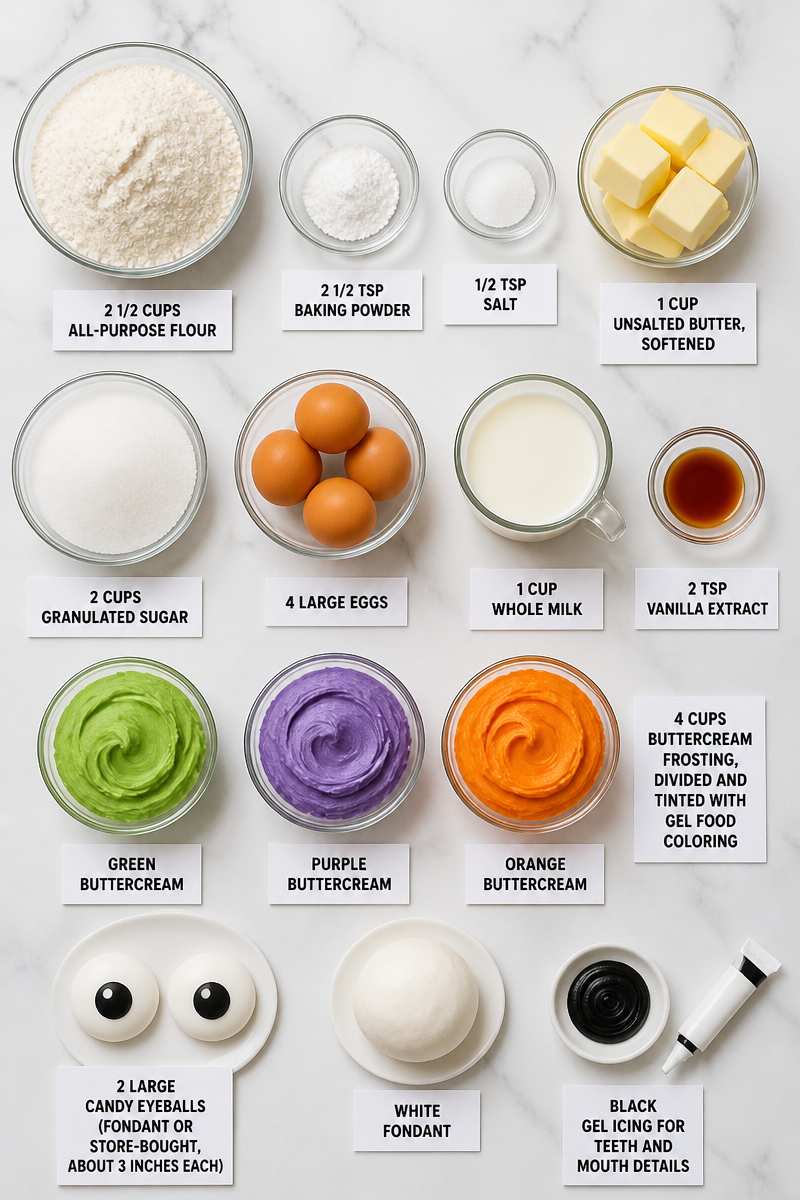
The cake itself is a classic vanilla layer cake made with 2 1/2 cups all-purpose flour, 2 1/2 tsp baking powder, 1/2 tsp salt, 1 cup unsalted butter, 2 cups granulated sugar, 4 large eggs, 1 cup whole milk, and 2 tsp vanilla extract. Then comes the fun part, which uses 4 cups buttercream frosting, divided and tinted green, purple, and orange with gel food coloring, 2 large candy eyeballs, white fondant, and black gel icing for the mouth and teeth. So, the flavor is soft, buttery, and sweet with a smooth vanilla taste, while the decorations add a bright, silly Halloween look.
The method is also very manageable. You will spend 40 minutes on prep and about 30 minutes baking, so the total time is 1 hour 30 minutes with cooling. This recipe makes one 8-inch two-layer cake, about 12 slices. First, you preheat the oven to 350°F and prepare two cake pans. Next, you mix the dry ingredients, cream the butter and sugar, then add the eggs, milk, and vanilla. After baking, cooling, and layering, you frost the cake in green, add purple and orange fur-like tufts, and finish with candy eyes and a fondant mouth. It is simple, and yet it looks impressive.
This Funny Monster Face Halloween Cake is perfect for Halloween parties, classroom celebrations, fall birthdays, and family movie nights. It also works well for potlucks, because it travels nicely once the cake is chilled. Better still, the decorating style lets everyone enjoy the fun, even if they are not expert bakers.
Why You’ll Love This Funny Monster Face Halloween Cake
- It uses simple pantry ingredients, so you do not need a long shopping list.
- The cake has a soft, moist vanilla crumb that most people enjoy.
- The decoration is playful, and therefore it is great for Halloween fun.
- The steps are easy to follow, even if you are not a cake-decorating pro.
- It serves 12 slices, so it is a smart choice for a small gathering or party.
All-Purpose Flour Tips
For this cake, all-purpose flour gives the best balance of structure and tenderness. Choose a fresh bag if possible, because old flour can taste flat and may not rise as well. Also, spoon the flour into your measuring cup and level it off, since packing it down can make the cake heavy. If you want a softer crumb, sift the flour once before mixing, especially if your kitchen is humid.
Options for Substitutions
- Use cake flour instead of all-purpose flour if you want a lighter, finer crumb.
- Swap the whole milk for 2% milk if that is what you have on hand.
- Use plant-based milk like oat milk or almond milk for a dairy-free option.
- Replace unsalted butter with salted butter, then reduce or skip the added salt.
- Use store-bought vanilla frosting if you do not want to make buttercream from scratch.
- If you cannot find candy eyeballs, make the eyes with fondant circles or large white chocolate candies.
Watch Out for These Mistakes
One common mistake is overmixing the batter. Once you add the flour and milk, mix only until the batter looks smooth. Otherwise, the cake can turn dense instead of soft. Also, make sure you add the dry ingredients and milk in the order given, because that helps the batter stay light.
Another issue is baking too long. Since oven temperatures can vary, start checking at 28 minutes. A toothpick should come out clean, but the cake should not look dry. Then, let the layers cool as directed. If you frost them while warm, the buttercream may slide and the cake may lean.
It is also easy to rush the decorating step. However, the cake needs to be fully cool before you add the green frosting, fur tufts, candy eyes, and fondant mouth. If the cake is even a little warm, the decorations can soften or slip. So, give yourself time and work in stages.
Finally, be careful with the candy eyeballs and fondant mouth placement. A small dab of frosting works well as glue, but too much can make the face slide. For the best look, step back after placing each piece and check the expression before moving on. That little pause makes a big difference.
What to Serve With Funny Monster Face Halloween Cake?
This Halloween cake pairs well with easy, kid-friendly sides like apple slices with caramel dip, popcorn mix, hot apple cider, or a simple fruit tray. Since the cake is sweet and rich, it is nice to balance it with something fresh or lightly salty. And if you are serving it at a party, a warm drink or snack bowl helps round out the table without stealing the spotlight.
Storage Instructions
Store: Keep the cake covered at room temperature for up to 2 days, or refrigerate it for up to 5 days. If you chill it, let it sit out until it reaches room temperature before serving. That helps the buttercream taste soft and smooth again.
Freeze: You can freeze the unfrosted cake layers for up to 2 months. Wrap each layer tightly in plastic wrap, then place them in a freezer bag or airtight container. For best results, freeze the decorated cake only if needed, since the candy eyes and fondant details can change texture.
Reheat: This cake does not need true reheating, but if you want to soften a chilled slice, let it sit at room temperature for about 30 to 45 minutes. If you prefer, warm a slice in the microwave for 10 to 15 seconds. For a larger portion, use a low stovetop-style warming setup by placing a slice in a covered heat-safe dish over a pot of warm water for a short time, just until the frosting softens slightly.
Recipe Info
Preparation Time: 40 minutes
Cooking Time: 30 minutes
Total Time: 1 hour 30 minutes, including cooling
Level of Difficulty: Easy to Medium
Servings: 12 slices
Estimated Nutrition
Estimated nutrition for the whole recipe (without optional ingredients):
- Calories: 5,200 to 5,900
- Protein: 55 to 70 grams
- Fat: 240 to 290 grams
- Carbohydrates: 720 to 820 grams
Ingredients
- For the cake: 2 1/2 cups all-purpose flour; 2 1/2 tsp baking powder; 1/2 tsp salt; 1 cup unsalted butter, softened; 2 cups granulated sugar; 4 large eggs; 1 cup whole milk; 2 tsp vanilla extract.
- For decorating: 4 cups buttercream frosting, divided and tinted green, purple, and orange with gel food coloring; 2 large candy eyeballs (fondant or store-bought, about 3 inches each); white fondant and black gel icing for teeth and mouth details.
Step-by-Step Instructions
Step 1: Prep the Pans and Oven
Preheat your oven to 350°F, then grease and flour two 8-inch round cake pans. This helps the layers release cleanly after baking, and it also makes the cake easier to stack later.
Step 2: Mix the Dry Ingredients
In a medium bowl, whisk together the flour, baking powder, and salt. This simple step spreads the leavening evenly through the batter, so the cake bakes up with a nice, even crumb.
Step 3: Make the Batter
In a large bowl, cream the butter and sugar together until light and fluffy, about 3 minutes. Then beat in the eggs one at a time. After that, add the dry ingredients and the milk in three additions, beginning and ending with the dry ingredients. Mix in the vanilla last. As you go, scrape down the bowl so everything blends well.
Step 4: Bake and Cool the Cake Layers
Divide the batter evenly between the two prepared pans. Bake for 28 to 30 minutes, or until a toothpick inserted in the center comes out clean. Then cool the cakes in the pans for 10 minutes before turning them out onto wire racks. Let them cool completely, which takes about 45 minutes.
Step 5: Frost and Decorate the Monster Face
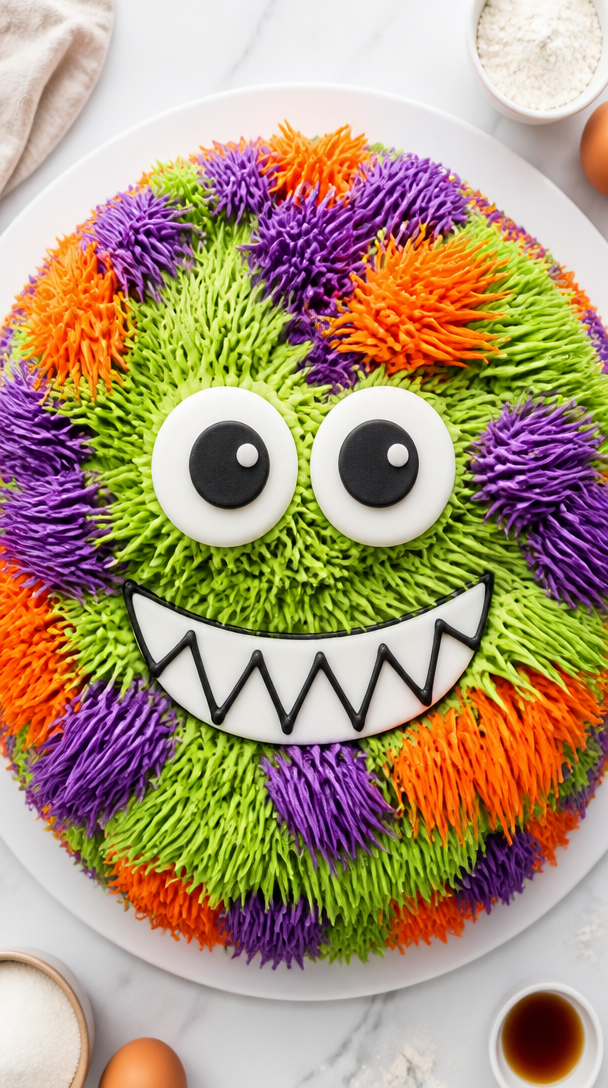
If needed, level the cake layers so they stack evenly. Then spread a layer of green frosting between the layers and frost the outside of the cake smoothly with the remaining green frosting. Next, use a piping bag to add purple and orange frosting in random tufts around the sides and top to create a fur-like look. After that, attach the two candy eyeballs with a small dab of frosting. Finally, cut a wide mouth from white fondant, add black gel icing teeth details, and press it onto the cake below the eyes.
Step 6: Store Before Serving
Once decorated, keep the cake covered until serving time. If you are making it ahead, store it at room temperature for up to 2 days or refrigerate for up to 5 days. Just remember to bring it back to room temperature before serving so the texture stays soft and pleasant.
Conclusion
This Funny Monster Face Halloween Cake is a fun mix of simple baking and playful decorating. The vanilla cake is soft and buttery, while the green frosting, bright fur tufts, candy eyes, and fondant mouth turn it into a real Halloween showpiece. Best of all, the recipe is friendly for home bakers and easy enough to make without stress.
If you try this recipe, I would love to hear how your monster face turned out. Share your thoughts, leave a comment, or explore more festive dessert ideas for your next party or family gathering.
