
This Halloween Monster Cookie Ice Cream Sandwich is pure comfort with a playful twist. It has that cozy homemade cookie feel, yet it also brings the fun of a frozen treat that makes people smile right away. In my opinion, it is the kind of dessert that works just as well for a family movie night as it does for a Halloween party table.
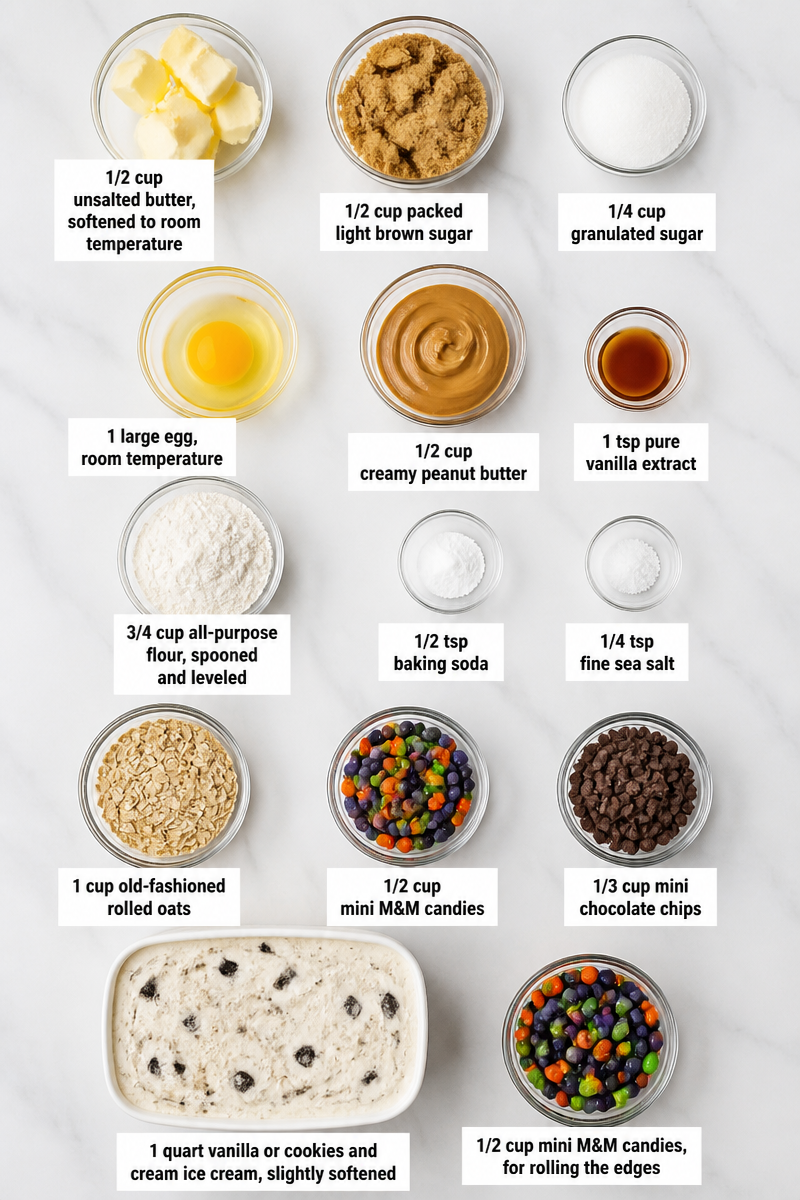
The cookie base is rich and chewy, thanks to 1/2 cup unsalted butter, softened to room temperature, 1/2 cup packed light brown sugar, 1/4 cup granulated sugar, 1 large egg, room temperature, 1/2 cup creamy peanut butter, and 1 tsp pure vanilla extract. Then you add 3/4 cup all-purpose flour, spooned and leveled, 1/2 tsp baking soda, 1/4 tsp fine sea salt, 1 cup old-fashioned rolled oats, 1/2 cup mini M&M candies, and 1/3 cup mini chocolate chips. For the filling and finish, you use 1 quart vanilla or cookies and cream ice cream, slightly softened plus 1/2 cup mini M&M candies, for rolling the edges. As a result, every bite tastes sweet, nutty, creamy, and just a little crunchy.
The method is simple, too. First, you mix the dough, then you bake the cookies for just 10 to 12 minutes. After that, you let them cool, sandwich them with ice cream, roll the edges in candy, and freeze. The total time is 2 hours 32 minutes, but most of that is hands-off freezing time. Because the recipe makes 10 servings, it is easy to share. Also, at about 385 calories per sandwich, it feels like a treat worth serving when you want something special.
This dessert is perfect for Halloween get-togethers, school parties, potlucks, and after-dinner fun at home. It is also a smart make-ahead option, since you can freeze the sandwiches and serve them later. So, if you need a festive dessert that feels homemade and still looks impressive, this Halloween Monster Cookie Ice Cream Sandwich is a great pick.
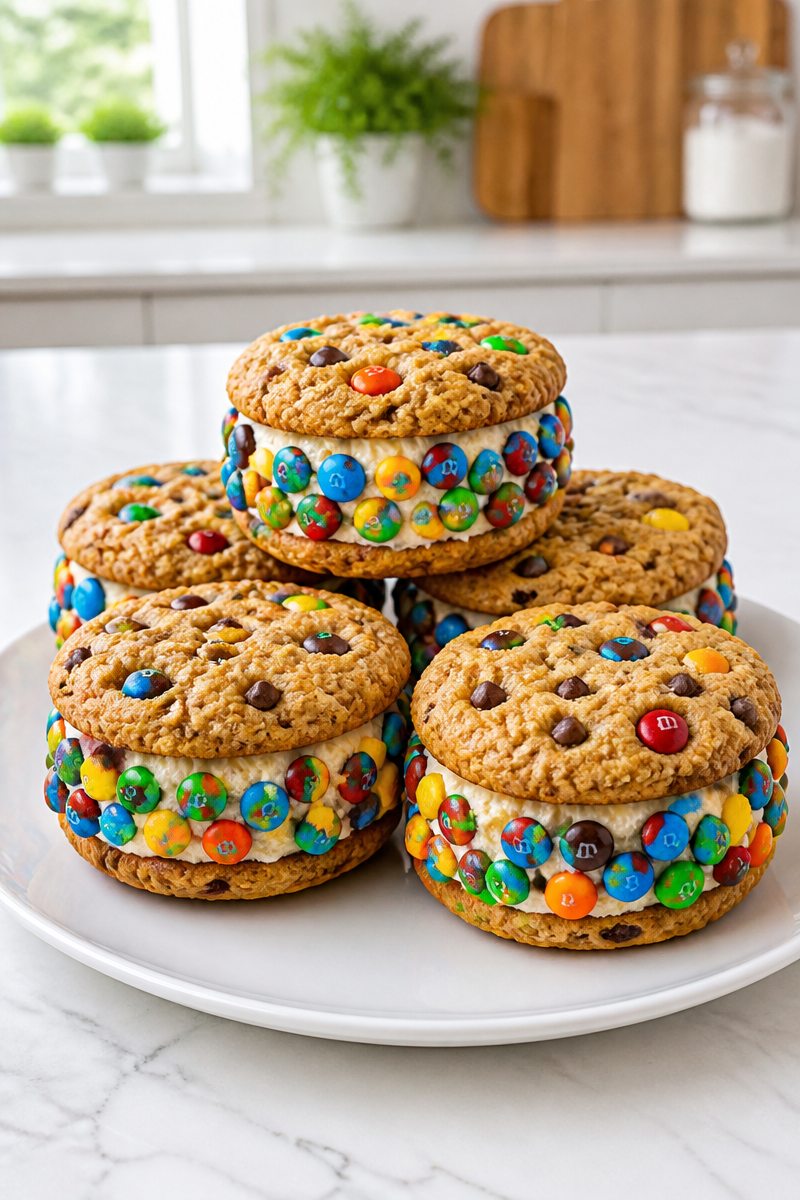
Why You’ll Love This Halloween Monster Cookie Ice Cream Sandwich
- It is easy to make, even if you do not bake often.
- The cookies are soft, chewy, and full of peanut butter flavor.
- The ice cream center keeps each bite cool and creamy.
- The mini M&M candies make it look colorful and festive.
- It is a great make-ahead dessert for parties, holidays, and busy weekends.
Peanut Butter Tips
Peanut butter is the main flavor builder in this recipe, so choose a creamy peanut butter with a smooth texture and a strong roasted peanut taste. In general, regular shelf-stable peanut butter works best here because it blends evenly into the dough and helps the cookies stay soft. If you use natural peanut butter, stir it very well first so the oil does not separate the dough. Also, make sure it is at room temperature, because cold peanut butter can make the butter mixture hard to blend. If you want the richest flavor, use a peanut butter you already enjoy eating by the spoonful.
Options for Substitutions
- Swap the mini M&M candies in the dough for chopped milk chocolate, dark chocolate chips, or peanut butter chips.
- Use cookies and cream ice cream instead of vanilla for a stronger cookie flavor.
- Replace the old-fashioned rolled oats with quick oats if that is what you have on hand.
- Use salted butter instead of unsalted butter, but reduce the added salt slightly.
- Try almond butter in place of peanut butter for a different nutty taste, though the flavor will change.
- Roll the edges in crushed sprinkles, chopped nuts, or mini chocolate chips instead of mini M&M candies.
Watch Out for These Mistakes
First, do not overbake the cookies. They should look just a little underdone in the center when you pull them from the oven. Then, as they cool, they will finish setting up and stay soft and chewy. If you bake them too long, the sandwiches can turn dry and hard once frozen.
Also, make sure the cookies are completely cool before you add the ice cream. If they are still warm, the ice cream will melt too fast, and the sandwich will slide around. For best results, let the cookies cool fully on the pan for about 25 minutes, or even a bit longer if needed.
Another common mistake is using ice cream that is too soft. You want it slightly softened, not soupy. That way, it spreads easily but still holds its shape. If it gets too soft, the sandwich can become messy and harder to freeze cleanly.
Finally, do not skip the final freeze. The sandwiches need at least 2 hours in the freezer so the ice cream firms up again. Otherwise, they may squish when you pick them up. For that reason, plan ahead and give them time to set before serving.
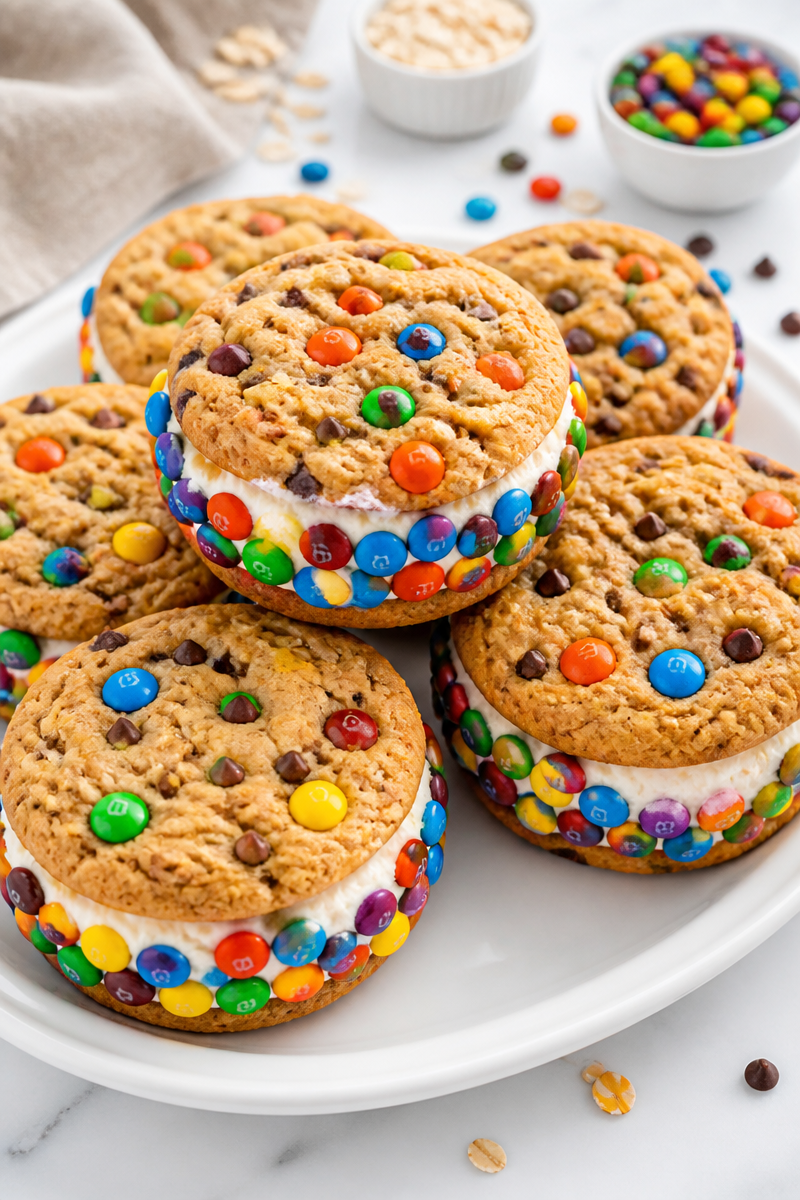
What to Serve With Halloween Monster Cookie Ice Cream Sandwich?
This Halloween Monster Cookie Ice Cream Sandwich pairs nicely with a few simple sides if you are building a dessert spread. Fresh fruit like strawberries or orange slices adds a bright, lighter bite, while a warm cup of hot cocoa or coffee balances the cold ice cream very well. For a party table, you could also serve caramel dip with apple slices or a small bowl of salty pretzels, since both add a nice contrast to the sweet cookie sandwich. In fact, a mix of creamy, fruity, and salty foods makes the whole dessert plate feel more complete.
Storage Instructions
Store: These ice cream sandwiches are best kept in the freezer, not the fridge. However, if you need to hold them briefly after assembly, you can refrigerate them for up to 1 day, but the texture will soften quickly. For longer freshness, keep them wrapped and frozen.
Freeze: Wrap each sandwich individually in plastic wrap, then place them in a freezer-safe container or bag. They will keep well for up to 2 weeks. For the best texture, let them sit at room temperature for 3 to 5 minutes before eating so the cookies soften slightly.
Reheat: This recipe is not meant to be reheated like a hot dessert. Still, if the cookies are frozen very hard, let the sandwich sit at room temperature for a few minutes. If you prefer a softer cookie without warming the ice cream too much, you can also warm only the cookie base in a low oven for a very short time before filling, but that works best before assembly. A microwave is not recommended for finished sandwiches because it will melt the ice cream fast.
Recipe Info
Preparation Time: 20 minutes, plus 2 hours freezing
Cooking Time: 12 minutes
Total Time: 2 hours 32 minutes
Level of Difficulty: Easy
Servings: 10
Yield: 10 sandwiches
Calories: 385 kcal per serving
Estimated Nutrition
Estimated nutrition for the whole recipe (without optional ingredients):
Calories: 3,700 to 3,950
Protein: 55 to 70 g
Fat: 180 to 220 g
Carbohydrates: 460 to 520 g
Ingredients
- For the cookies: 1/2 cup unsalted butter, softened to room temperature
- For the cookies: 1/2 cup packed light brown sugar
- For the cookies: 1/4 cup granulated sugar
- For the cookies: 1 large egg, room temperature
- For the cookies: 1/2 cup creamy peanut butter
- For the cookies: 1 tsp pure vanilla extract
- For the cookies: 3/4 cup all-purpose flour, spooned and leveled
- For the cookies: 1/2 tsp baking soda
- For the cookies: 1/4 tsp fine sea salt
- For the cookies: 1 cup old-fashioned rolled oats
- For the cookies: 1/2 cup mini M&M candies
- For the cookies: 1/3 cup mini chocolate chips
- For assembly: 1 quart vanilla or cookies and cream ice cream, slightly softened
- For assembly: 1/2 cup mini M&M candies, for rolling the edges
Step-by-Step Instructions
Step 1: Prep the Oven and Baking Sheets
Start by preheating your oven to 350°F (175°C). Then line two baking sheets with parchment paper. This step helps the cookies bake evenly and makes cleanup much easier later on.
Step 2: Mix the Wet Ingredients
In a large bowl, beat the butter, brown sugar, and granulated sugar until the mixture looks light and fluffy, about 2 to 3 minutes. Next, beat in the egg, peanut butter, and vanilla until everything is well combined. At this stage, the dough base should look creamy and smooth.
Step 3: Add the Dry Ingredients and Mix Ins
In a separate bowl, whisk the flour, baking soda, and salt together. Then add that dry mixture to the butter mixture along with the oats. Mix on low speed just until combined, because overmixing can make the cookies tough. After that, fold in the mini M&M candies and chocolate chips by hand.
Step 4: Shape and Bake the Cookies
Scoop the dough into 20 portions, about 2 tablespoons each. Place them about 2 inches apart on the prepared baking sheets, then flatten each one slightly with your palm. Bake for 10 to 12 minutes, until the edges are set and golden but the centers still look a little underbaked. Then let the cookies cool completely on the pan for about 25 minutes.
Step 5: Assemble the Ice Cream Sandwiches
Once the cookies are fully cooled, place about 1/3 cup of slightly softened ice cream on the flat side of one cookie. Top it with a second cookie, flat-side down, and press gently so the ice cream spreads toward the edges. Next, roll the exposed ice cream edge in mini M&M candies and press gently so they stick.
Step 6: Freeze Until Firm
Place the finished sandwiches on a parchment-lined tray and freeze for at least 2 hours. After that, the ice cream should be firm again and ready to serve. If you want to store them longer, wrap each one individually in plastic wrap and keep them in the freezer for up to 2 weeks. Before serving, let them sit out for 3 to 5 minutes so they are easier to eat.
Conclusion
This Halloween Monster Cookie Ice Cream Sandwich is a fun, sweet, and simple treat that brings together chewy peanut butter cookies, creamy ice cream, and colorful candy. It is easy enough for home cooks, yet festive enough for Halloween parties and family celebrations. Best of all, you can make it ahead, freeze it, and enjoy it whenever you need a cheerful dessert.
If you try this recipe, I would love to hear how it turned out. Share your thoughts, leave a comment, or explore more easy dessert recipes for your next gathering.
Print
Halloween Monster Cookie Ice Cream Sandwich
- Prep Time: 20 minutes
- Cook Time: 12 minutes
- Total Time: 152 minutes
- Yield: 10 servings 1x
- Category: Dessert
- Method: Baking
- Cuisine: American
- Diet: Vegetarian
Description
A fun and festive dessert combining chewy peanut butter cookies with creamy ice cream and colorful candy, perfect for Halloween parties or family movie nights.
Ingredients
- 1/2 cup unsalted butter, softened
- 1/2 cup packed light brown sugar
- 1/4 cup granulated sugar
- 1 large egg, room temperature
- 1/2 cup creamy peanut butter
- 1 tsp pure vanilla extract
- 3/4 cup all-purpose flour, spooned and leveled
- 1/2 tsp baking soda
- 1/4 tsp fine sea salt
- 1 cup old-fashioned rolled oats
- 1/2 cup mini M&M candies
- 1/3 cup mini chocolate chips
- 1 quart vanilla or cookies and cream ice cream, slightly softened
- 1/2 cup mini M&M candies for rolling the edges
Instructions
- Preheat your oven to 350°F (175°C) and line two baking sheets with parchment paper.
- Beat the butter, brown sugar, and granulated sugar until light and fluffy, about 2 to 3 minutes. Then beat in the egg, peanut butter, and vanilla until combined.
- Whisk the flour, baking soda, and salt in a separate bowl, then add to the butter mixture along with oats. Mix on low speed until combined, then fold in mini M&M candies and chocolate chips by hand.
- Scoop the dough into 20 portions, place them on the baking sheets, flatten slightly, and bake for 10 to 12 minutes.
- Let the cookies cool completely on the pan for about 25 minutes.
- Assemble the sandwiches by placing ice cream on one cookie, topping with another, and rolling edges in mini M&M candies.
- Freeze the sandwiches for at least 2 hours until firm.
Notes
Allow sandwiches to sit at room temperature for 3 to 5 minutes before serving for easier eating. Can be made ahead and frozen for up to 2 weeks.
Nutrition
- Serving Size: 1 sandwich
- Calories: 385
- Sugar: 25g
- Sodium: 150mg
- Fat: 20g
- Saturated Fat: 8g
- Unsaturated Fat: 10g
- Trans Fat: 0g
- Carbohydrates: 50g
- Fiber: 3g
- Protein: 6g
- Cholesterol: 35mg
