
These homemade moon pies with chocolate marshmallow are pure comfort in dessert form. They have that old-fashioned charm people remember from lunchboxes and bakery counters, but here you get the richer, fresher taste of making them at home. As a food blogger, I love recipes like this because they feel special, yet they still bring people together in a very simple way.
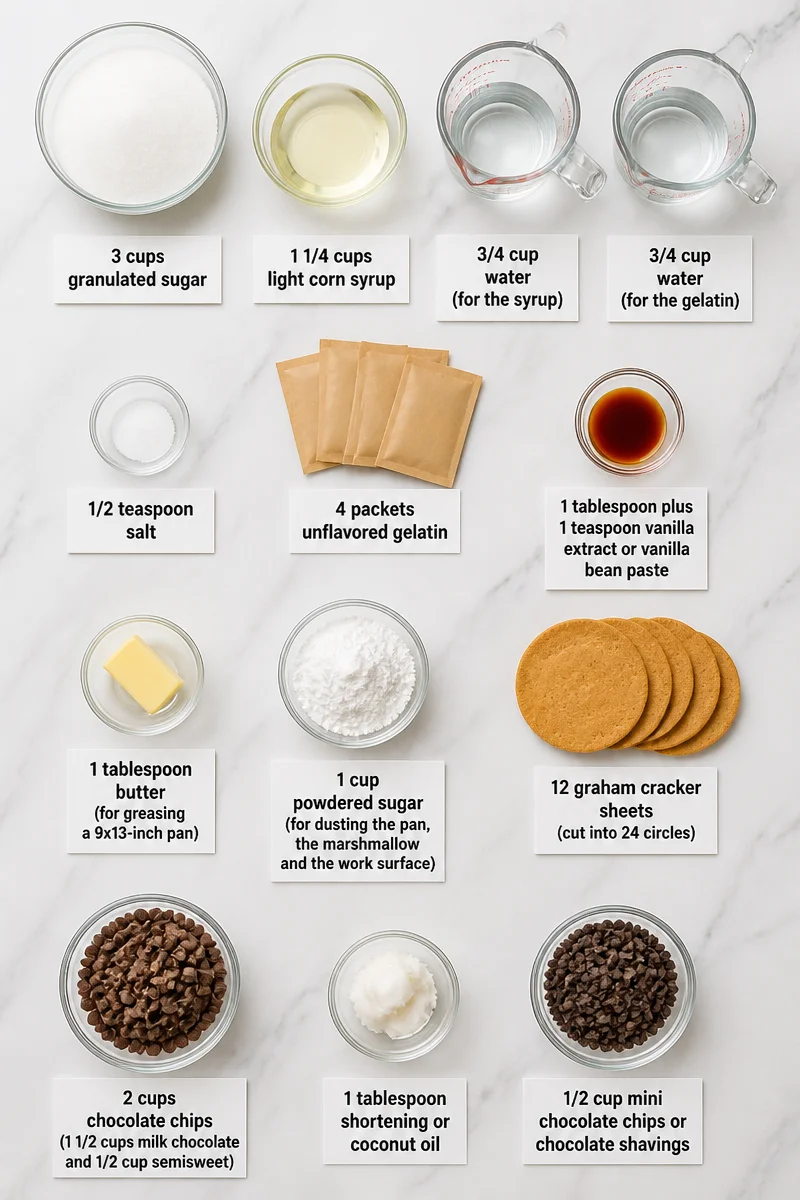
The filling starts with 3 cups granulated sugar, 1 1/4 cups light corn syrup, 1 1/2 cups water, 1/2 teaspoon salt, 4 packets unflavored gelatin, and 1 tablespoon plus 1 teaspoon vanilla extract or vanilla bean paste. Then the pans and work surface are dusted with butter and 1 cup powdered sugar so the marshmallow stays easy to handle. After that, the cookie base uses 12 graham cracker sheets, the chocolate coating uses 2 cups chocolate chips plus 1 tablespoon shortening or coconut oil, and the top finish comes from 1/2 cup mini chocolate chips or chocolate shavings. The flavor is sweet, creamy, chocolatey, and lightly toasted if you choose to torch the edges.
The method is easier than it looks. First, you make a marshmallow mixture on the stovetop, then let it whip until thick and fluffy. After that, it sets in a pan, gets cut into rounds, and is tucked between graham cracker circles. Finally, each sandwich is dipped in melted chocolate and finished with a little extra topping. In other words, the recipe has a few moving parts, but each step is clear and manageable.
This is a wonderful recipe for cozy weekends, birthdays, holiday trays, and sharing with neighbors. It is also a sweet choice for potlucks, since the moon pies travel well and feel nostalgic in the best way. So, if you want a dessert that looks impressive but still feels friendly and familiar, this one is a lovely pick.
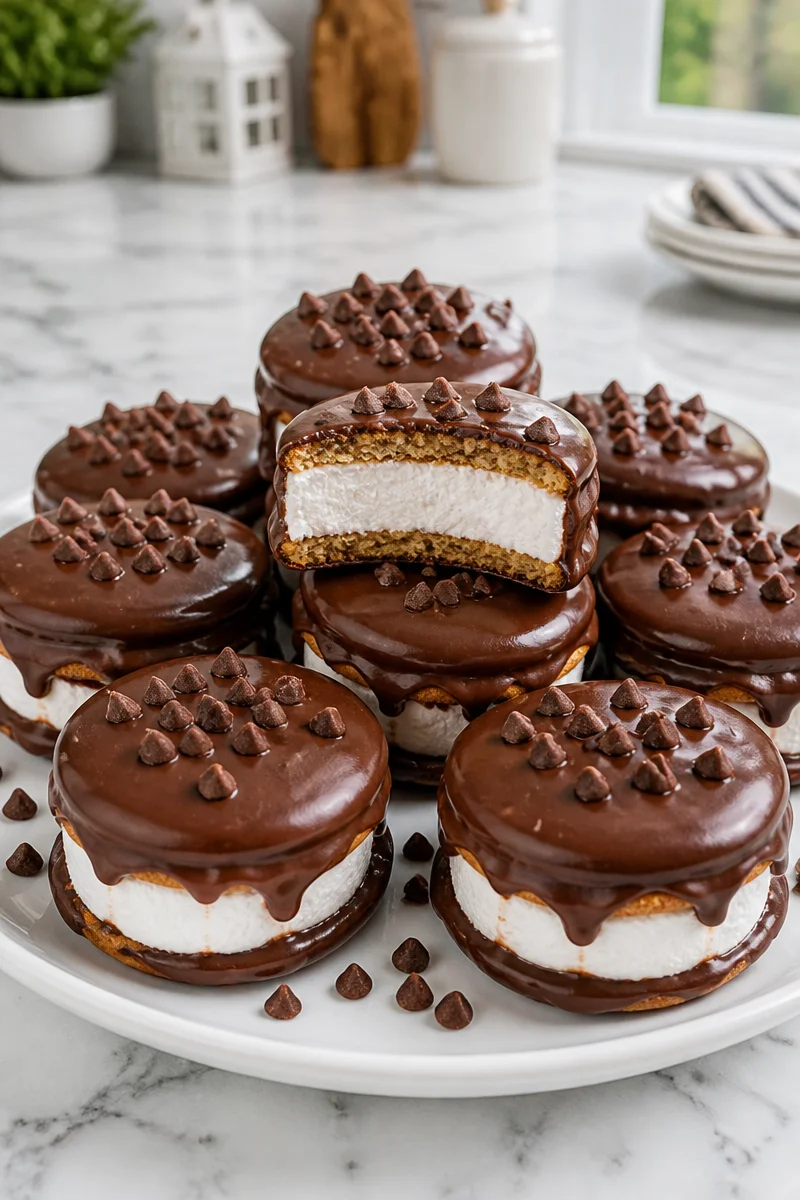
Why You’ll Love This Homemade Moon Pies with Chocolate Marshmallow
- Classic comfort: These moon pies taste like a bakery treat, but they are made right in your own kitchen.
- Great texture: You get soft marshmallow, crisp graham crackers, and a smooth chocolate shell in every bite.
- Simple pantry ingredients: Most of the ingredients are common and easy to find.
- Fun to make ahead: Since the marshmallow needs time to set, this dessert fits well into a relaxed baking day.
- Crowd-pleasing flavor: Kids and adults both tend to love the sweet chocolate and vanilla flavor.
Marshmallow Tips
Because the main feature of these homemade moon pies is the marshmallow, it helps to give that part extra care. Use fresh, unflavored gelatin so the filling sets well and stays springy. Also, make sure your sugar syrup reaches 240°F, because that temperature helps build the right structure. While whipping, the mixture should become thick, glossy, and stiff, so give it the full time it needs. If your kitchen is humid, the marshmallow may feel a little softer, but that is normal. In addition, dusting with powdered sugar is important, since it keeps the slab from sticking to the pan, the cutter, and your hands. If you work neatly, the marshmallow will slice into clean rounds and sandwich beautifully.
Options for Substitutions
- Swap light corn syrup with golden syrup if you want a deeper, richer flavor.
- Use vanilla bean paste instead of vanilla extract for a stronger vanilla taste and tiny specks of vanilla throughout.
- Replace the milk chocolate and semisweet chips with dark chocolate chips if you prefer a less sweet coating.
- Use coconut oil instead of shortening for a slightly different finish and a smoother melt.
- If you do not have graham cracker sheets, use store-bought graham cracker crumbs pressed into thin circles, although the texture will change a bit.
- For topping, use chopped toasted nuts instead of mini chocolate chips if you want more crunch.
Watch Out for These Mistakes
One common mistake is rushing the marshmallow syrup. If you stop cooking before it reaches 240°F, the filling may stay too soft and will not hold its shape well. On the other hand, if you cook it too long, the marshmallow can become dense or sticky instead of light and fluffy. So, a candy thermometer is your best friend here.
Another thing to watch is the whipping stage. The mixture needs enough time to aerate properly, and that is what gives the marshmallow its body. If you underwhip it, the filling may be loose and hard to slice. However, if you stop too soon because it looks fluffy enough, the texture may not firm up correctly later. For best results, watch both the clock and the look of the mixture.
Also, do not skip the powdered sugar coating on the pan and work surface. Marshmallow is sticky, and without that sugar, it can cling to everything. In the same way, rolling the cut edges in powdered sugar helps the circles stay neat. If you move too fast and skip this step, the rounds may smear or lose their shape.
Finally, be careful when dipping the sandwiches in chocolate. If the chocolate is too hot, it can slide off the cookie or soften the marshmallow too much. Therefore, let the melted chocolate cool slightly before dipping. After that, let each moon pie rest so the coating can set before you move or stack it.
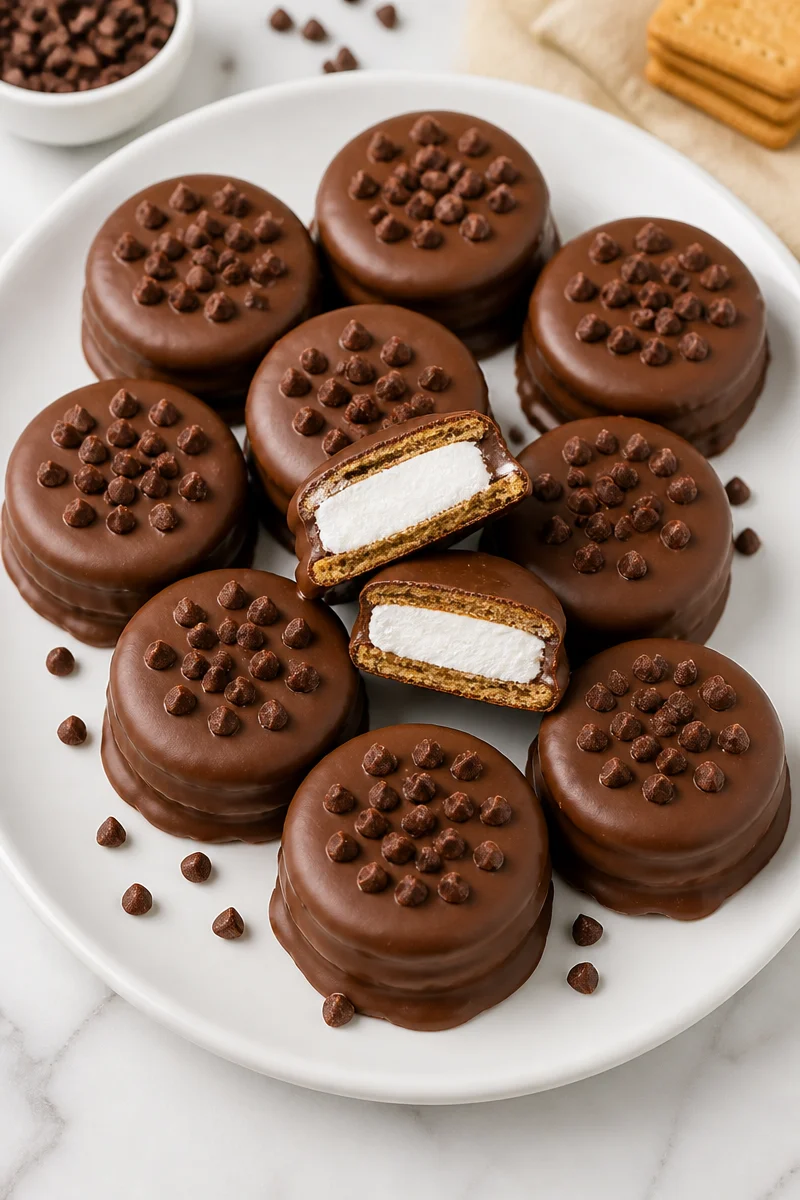
What to Serve With Homemade Moon Pies with Chocolate Marshmallow?
These homemade moon pies pair well with a cold glass of milk, hot coffee, or a mug of cocoa, since all three balance the sweet chocolate coating nicely. They also go well with fresh berries, which add a bright, tart note. If you are serving a dessert tray, you could add vanilla ice cream or a simple fruit salad so the plate feels a little lighter. For a cozy afternoon snack, a cup of tea or warm chai is a lovely match too.
Storage Instructions
Store: Keep homemade moon pies in an airtight container in the fridge for up to 5 days. Place parchment paper between layers so the chocolate shell does not stick.
Freeze: Wrap each moon pie individually, then freeze for up to 2 months. For the best texture, thaw them overnight in the refrigerator before serving.
Reheat: These are best served chilled or at room temperature, so reheating is not usually needed. If you want a softer bite, let one sit at room temperature for 10 to 15 minutes. If you prefer to warm the chocolate slightly, use the microwave in very short bursts, just a few seconds at a time. Be careful, though, because the marshmallow can soften quickly.
Recipe Info
Preparation Time: 30 minutes, plus 4 hours 40 minutes setting and chilling
Cooking Time: 15 minutes
Total Time: 5 hours 25 minutes
Level of Difficulty: Easy to medium
Servings: 12 servings
Estimated Nutrition
Estimated nutrition for the whole recipe (without optional ingredients):
- Calories: 5,900 to 6,300
- Protein: 25 to 35 g
- Fat: 120 to 150 g
- Carbohydrates: 1,050 to 1,150 g
Ingredients
- Marshmallow:
- 3 cups granulated sugar
- 1 1/4 cups light corn syrup
- 1 1/2 cups water, divided (3/4 cup for the syrup, 3/4 cup for the gelatin)
- 1/2 teaspoon salt
- 4 packets unflavored gelatin
- 1 tablespoon plus 1 teaspoon vanilla extract or vanilla bean paste
- Pan prep and dusting:
- 1 tablespoon butter, for greasing a 9×13-inch pan
- 1 cup powdered sugar, for dusting the pan, the marshmallow and the work surface
- Cookie base:
- 12 graham cracker sheets (cut into 24 circles)
- Chocolate coating:
- 2 cups chocolate chips (1 1/2 cups milk chocolate and 1/2 cup semisweet)
- 1 tablespoon shortening or coconut oil
- Topping:
- 1/2 cup mini chocolate chips or chocolate shavings
Step-by-Step Instructions
Step 1: Prep the Pan and Start the Marshmallow
Grease a 9×13-inch pan with the butter, then coat it well with some of the powdered sugar. Save the rest for later. Meanwhile, this sugar layer helps prevent sticking and makes the marshmallow easier to remove after it sets.
Step 2: Cook the Sugar Syrup
In a large saucepan over medium heat, combine 3/4 cup of the water, the granulated sugar, corn syrup, and salt. Bring the mixture to a boil, then cook until a candy thermometer reads 240°F, which usually takes about 8 to 10 minutes. During this step, stay close to the stove so the syrup does not overcook.
Step 3: Bloom the Gelatin
While the syrup cooks, put the remaining 3/4 cup water and the gelatin in the bowl of a stand mixer. Use the whisk attachment on low speed and stir until the gelatin swells and softens. This step is called blooming, and it helps the marshmallow mixture whip up smoothly later.
Step 4: Whip the Marshmallow Filling
With the mixer still on low, slowly stream in the hot syrup. Then raise the speed to high and whip for about 12 minutes, or until the mixture is thick and stiff. After that, add the vanilla and whip for 3 more minutes. The filling should look glossy, airy, and firm enough to hold shape.
Step 5: Set and Cut the Marshmallow
Scrape the marshmallow into the prepared pan and let it set at room temperature for 4 hours, until firm. It may still wobble a little, and that is normal. Once set, loosen the edges with a knife, turn the slab out onto a powdered sugar-dusted surface, and cut 12 circles with a 2 1/2 to 3-inch cutter. Roll the cut edges in powdered sugar so they do not stick together.
Step 6: Assemble, Dip, and Finish
Use the same cutter to make 24 circles from the graham cracker sheets. Next, melt the chocolate chips in the microwave in short bursts, stirring between each, until smooth. Stir in the shortening or coconut oil. Spread a small dab of chocolate on one side of each graham circle, then place a marshmallow round on 12 of them and top with the remaining graham circles to make sandwiches. Rest for 10 minutes. After that, dip each sandwich in the melted chocolate, set it on wax paper, and scatter the mini chips or chocolate shavings on top. Rest for 10 minutes more, then chill for 20 minutes. If you want, lightly toast the marshmallow edges with a kitchen torch just before serving.
Conclusion
These homemade moon pies with chocolate marshmallow bring together soft marshmallow, crisp graham crackers, and a rich chocolate shell in a way that feels both nostalgic and special. They do take a little time, but most of that time is hands-off, so the process is very manageable. Plus, the finished treats store well, which makes them handy for sharing or enjoying over several days.
If you try this recipe, I would love to hear how it turned out for you. Share your thoughts, your favorite variation, or any questions in the comments, and feel free to explore more cozy homemade desserts for your next baking day.
Print
Homemade Moon Pies with Chocolate Marshmallow
- Prep Time: 30 minutes
- Cook Time: 15 minutes
- Total Time: 325 minutes
- Yield: 12 servings 1x
- Category: Dessert
- Method: Baking
- Cuisine: American
- Diet: Vegetarian
Description
These homemade moon pies with chocolate marshmallow are a delightful recipe that brings a nostalgic taste to your kitchen, featuring soft marshmallow, crisp graham crackers, and a rich chocolate coating.
Ingredients
- 3 cups granulated sugar
- 1 1/4 cups light corn syrup
- 1 1/2 cups water, divided (3/4 cup for the syrup, 3/4 cup for the gelatin)
- 1/2 teaspoon salt
- 4 packets unflavored gelatin
- 1 tablespoon plus 1 teaspoon vanilla extract or vanilla bean paste
- 1 tablespoon butter, for greasing a 9×13-inch pan
- 1 cup powdered sugar, for dusting
- 12 graham cracker sheets, cut into 24 circles
- 2 cups chocolate chips (1 1/2 cups milk chocolate and 1/2 cup semisweet)
- 1 tablespoon shortening or coconut oil
- 1/2 cup mini chocolate chips or chocolate shavings
Instructions
- Prep the Pan and Start the Marshmallow: Grease a 9×13-inch pan with the butter, then coat it well with some of the powdered sugar.
- Cook the Sugar Syrup: In a large saucepan over medium heat, combine 3/4 cup of the water, granulated sugar, corn syrup, and salt. Bring the mixture to a boil, cooking until a candy thermometer reads 240°F.
- Bloom the Gelatin: While the syrup cooks, put the remaining 3/4 cup water and the gelatin in the bowl of a stand mixer and let it bloom.
- Whip the Marshmallow Filling: Slowly stream in the hot syrup to the bloomed gelatin while mixing on low, then whip for about 12 minutes on high.
- Set and Cut the Marshmallow: Scrape the marshmallow into the prepared pan and let it set at room temperature for 4 hours. Once set, cut into circles.
- Assemble, Dip, and Finish: Make sandwiches with the graham crackers and marshmallow, dip in melted chocolate, and sprinkle mini chocolate chips on top.
Notes
These moon pies store well in an airtight container for up to 5 days and can be frozen for up to 2 months. Thaw in the refrigerator before serving.
Nutrition
- Serving Size: 1 moon pie
- Calories: 500
- Sugar: 40g
- Sodium: 150mg
- Fat: 18g
- Saturated Fat: 8g
- Unsaturated Fat: 8g
- Trans Fat: 0g
- Carbohydrates: 78g
- Fiber: 2g
- Protein: 4g
- Cholesterol: 10mg
