
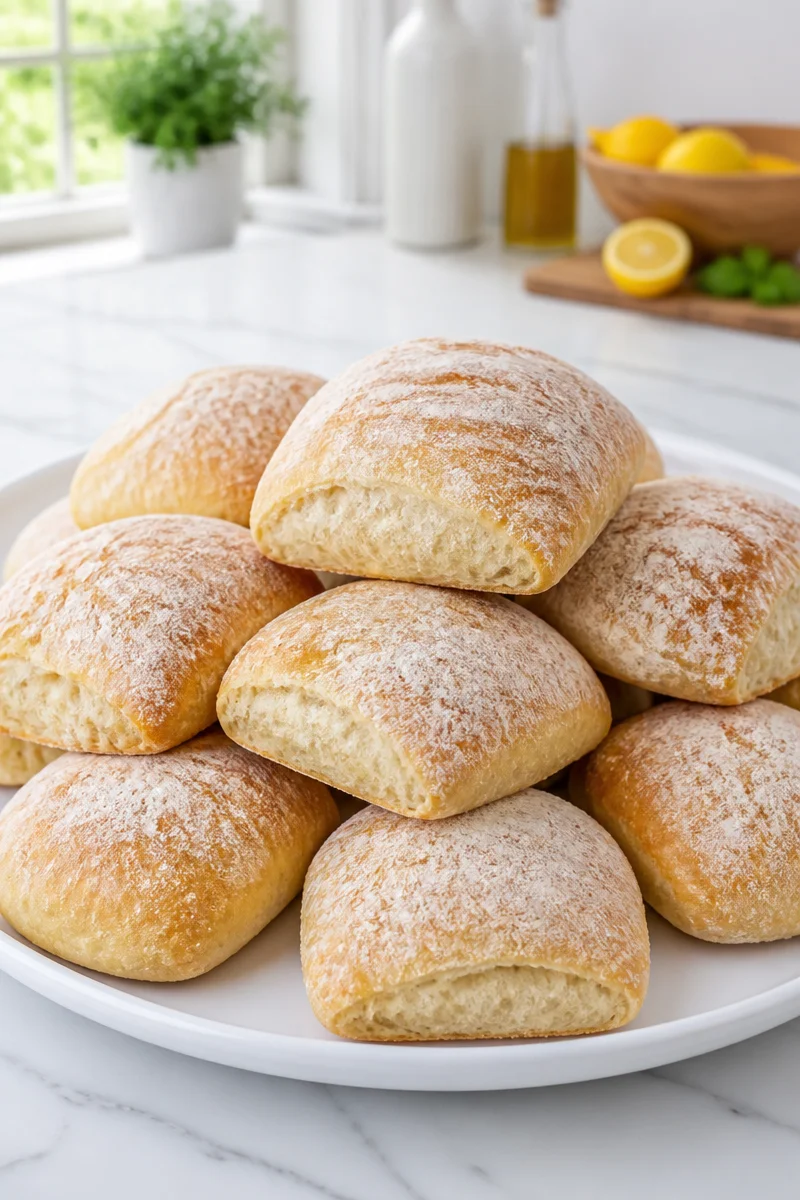
Rustic Homemade Ciabatta Bread Rolls are pure comfort in bread form. They have a crisp crust, a soft middle, and that lovely homemade smell that makes a kitchen feel warm and inviting. I like them because they look fancy, yet they still feel like everyday bread you can serve with almost anything.
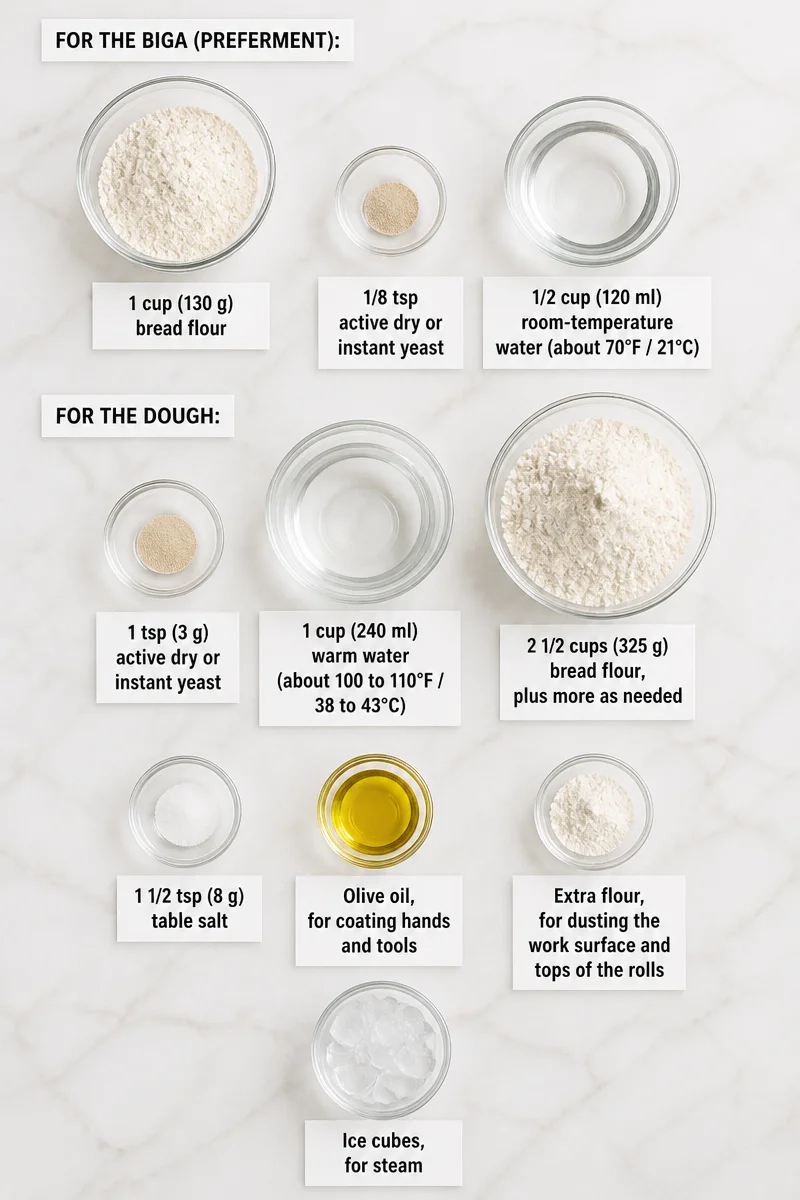
What makes these rolls so special is the simple mix of bread flour, yeast, water, and salt, plus the long rest that builds flavor. The biga starts with 1 cup (130 g) bread flour, 1/8 tsp active dry or instant yeast, and 1/2 cup (120 ml) room-temperature water. Then the dough comes together with 1 tsp (3 g) active dry or instant yeast, 1 cup (240 ml) warm water, 2 1/2 cups (325 g) bread flour, 1 1/2 tsp (8 g) table salt, a little olive oil, extra flour for handling, and ice cubes for steam. As a result, the rolls bake up with a mild, wheaty taste, a light tang from the preferment, and a chewy texture that feels very classic and rustic.
The method is easier than it sounds. First, you make the biga on Day 1 and let it rest until bubbly. Next, on Day 2, you activate the yeast, mix the dough, and let it rest. Then you do a few rounds of stretch-and-folds, chill the dough, shape it, give it a final rise, and bake with steam. In other words, most of the time is hands-off, so the recipe is friendly even if you are not a bread expert.
These Rustic Homemade Ciabatta Bread Rolls are perfect for family dinners, soup night, and weekend meals. They also work well for potlucks, sandwich trays, and holiday tables. So, if you want bread that feels homemade, special, and easy to enjoy, this recipe is a wonderful choice.
Why You’ll Love This Rustic Homemade Ciabatta Bread Rolls
- Simple ingredients: You only need basic pantry items like bread flour, yeast, salt, and water.
- Great texture: The rolls bake with a crisp crust and an airy, chewy center.
- Rich flavor: The biga gives the bread a deeper, more developed taste.
- Flexible serving size: You can make 8 rolls or shape the dough into 2 flat loaves.
- Good for planning ahead: Since the dough rests and chills, you can work around your schedule.
Bread Flour Tips
Bread flour is the backbone of these Rustic Homemade Ciabatta Bread Rolls, so choose a good-quality brand with a high protein level if you can. That higher protein helps build gluten, which gives the rolls their chewy crumb and better rise. Also, measure it carefully. Too much flour can make the dough stiff, and then the rolls will lose that light, open texture that ciabatta is known for. If the dough feels very loose at first, that is normal. In fact, this recipe is meant to start sticky.
Options for Substitutions
- Use all-purpose flour instead of bread flour if needed, but expect a slightly softer and less chewy crumb.
- Swap active dry yeast for instant yeast in equal amounts, or use instant yeast throughout for a slightly easier mix.
- Replace table salt with fine sea salt, but use a little less since sea salt can taste stronger by volume.
- Use cornmeal or semolina under the parchment for a different texture and easier handling.
- Brush the rolls with a little melted butter instead of olive oil on the outside after baking for a softer finish.
- Add a small amount of dried herbs like rosemary or thyme to the dough for a savory twist.
Watch Out for These Mistakes
The biggest mistake is adding too much flour too soon. This dough should stay wet and sticky. If you keep dumping in flour during mixing, the rolls can turn dense. So, trust the process and use oiled hands or a spatula when the dough feels hard to handle.
Another common problem is rushing the rises. The biga needs time to become bubbly, and the dough needs all four stretch-and-fold rounds to build strength. If you shorten those steps, the rolls may not hold their shape well. Also, make sure the yeast is foamy before you mix the dough, because that tells you it is active.
Shaping can also cause trouble. Because ciabatta dough is soft, it helps to use a heavily floured surface and handle it gently. If you press too hard, you will squeeze out the air. Instead, pat the dough into shape and cut it cleanly.
Finally, do not skip the steam. The ice cubes in the bottom pan help create a moist oven, which improves oven spring and crust color. Likewise, let the bread cool before slicing. If you cut too early, the crumb can seem gummy even when the rolls are fully baked.
What to Serve With Rustic Homemade Ciabatta Bread Rolls?
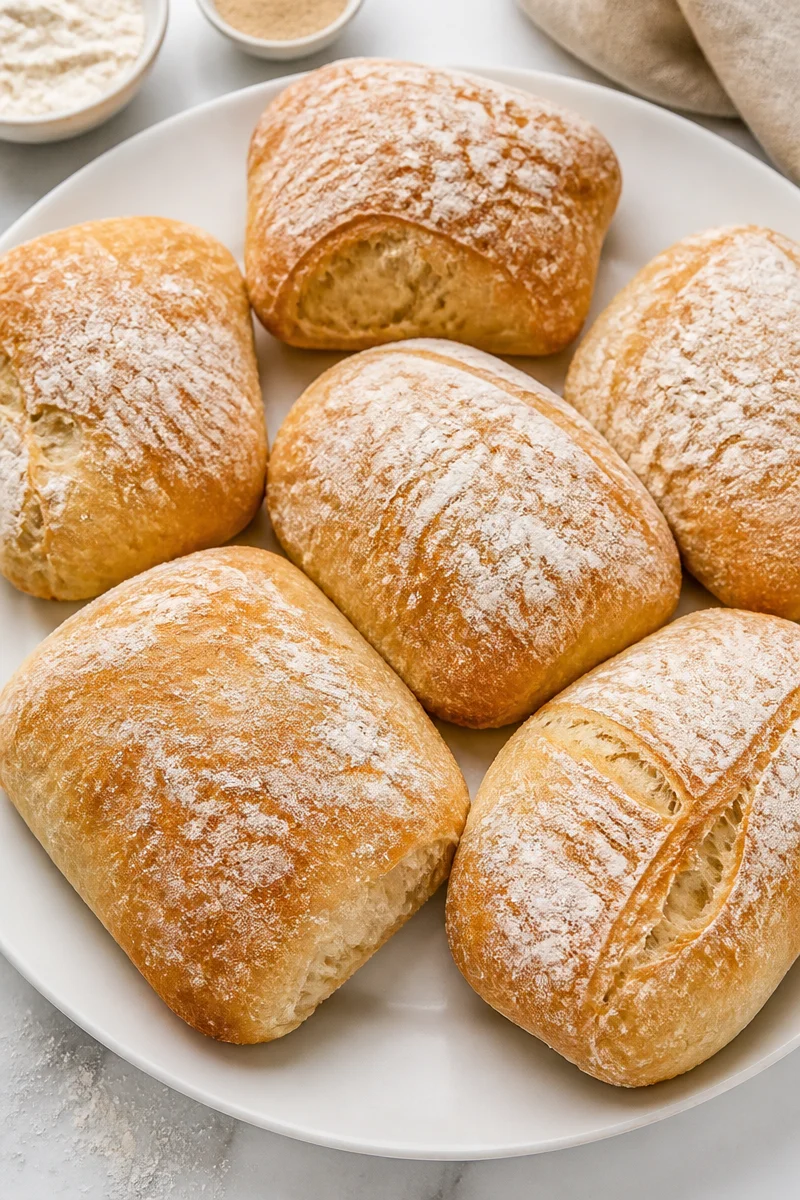
These Rustic Homemade Ciabatta Bread Rolls pair well with a lot of everyday meals. Try them with tomato soup, chicken soup, or a thick vegetable stew for a cozy dinner. They are also excellent with pasta, especially dishes with sauce that beg for bread on the side. In addition, you can serve them with olive oil and balsamic vinegar, a simple salad, or a cheese board for an easy lunch or appetizer spread.
Storage Instructions
Store: Keep the rolls loosely covered at room temperature for up to 5 days. If you want them to stay a little longer, you can refrigerate them for up to 1 week, although the texture is best at room temperature.
Freeze: Freeze baked rolls for up to 3 months. Wrap them well, then place them in a freezer bag or airtight container. Thaw at room temperature before reheating.
Reheat: For the stovetop, warm the rolls in a covered skillet over low heat for a few minutes, or lightly toast split rolls cut side down. For the microwave, wrap one roll in a damp paper towel and heat in short bursts, about 10 to 15 seconds at a time, so it stays soft instead of tough.
Recipe Info
- Preparation Time: 30 minutes, plus 8 hours for the biga, 2 hours for folding rests, 1 hour chilling, and 1 hour final rest
- Cooking Time: 25 minutes, plus 45 minutes cooling
- Total Time: 13 hours 40 minutes
- Level of Difficulty: Medium
- Servings: 8 rolls
- Kcal: 233 kcal per serving
Estimated Nutrition
Estimated nutrition for the whole recipe (without optional ingredients):
- Calories: 1,700 to 2,000 kcal
- Protein: 45 to 60 g
- Fat: 8 to 18 g
- Carbohydrates: 330 to 380 g
Ingredients
- FOR THE BIGA (PREFERMENT):
- 1 cup (130 g) bread flour
- 1/8 tsp active dry or instant yeast
- 1/2 cup (120 ml) room-temperature water (about 70°F / 21°C)
- FOR THE DOUGH:
- 1 tsp (3 g) active dry or instant yeast
- 1 cup (240 ml) warm water (about 100 to 110°F / 38 to 43°C)
- 2 1/2 cups (325 g) bread flour, plus more as needed
- 1 1/2 tsp (8 g) table salt
- Olive oil, for coating hands and tools
- Extra flour, for dusting the work surface and tops of the rolls
- Ice cubes, for steam
Step-by-Step Instructions
Step 1: Make the Biga
Stir the biga flour, yeast, and room-temperature water together in a bowl. Then cover the bowl and let it rest at room temperature for 8 to 24 hours, until the mixture looks bubbly and active. This slow start builds flavor and helps the bread taste deeper and more complex.
Step 2: Activate the Yeast
On Day 2, stir the yeast into the warm water and let it sit for 5 to 10 minutes until foamy. Meanwhile, prepare a large mixing bowl and keep your flour and salt close by. If the yeast does not foam, it may be old, so it is better to stop and start fresh.
Step 3: Mix the Dough
Add the biga, flour, and salt to the yeast mixture. Then mix with a spatula, wooden spoon, or stand mixer with a dough hook, but not a handheld mixer. Keep going until you have a wet, sticky, uniform dough. At this stage, the dough should look rough but well combined, and that is exactly what you want.
Step 4: Rest and Strengthen the Dough
Cover the bowl and let the dough rest for 30 minutes. After that, begin the stretch-and-fold process. With oiled hands or a spatula, lift one side of the dough, stretch it up, and fold it over. Then turn the bowl 90 degrees and repeat until you have gone all the way around twice. Rest the dough 30 minutes between rounds, and repeat this process four times total. As a result, the dough becomes stronger without heavy kneading.
Step 5: Chill and Shape
After the last fold, cover the bowl and refrigerate the dough for at least 1 hour and up to 24 hours. When you are ready, turn the dough onto a heavily floured surface and pat it into a rectangle about 10 x 7 inches. Cut it into 8 pieces for rolls, or into 2 rectangles if you want flat loaves. Then move the pieces to floured parchment with at least 2 inches between them, dust the tops with flour, cover loosely, and let them rest for 1 hour.
Step 6: Bake and Cool
About an hour before baking, place a baking sheet on the center rack and a pan on the bottom rack, then heat the oven to 450°F (232°C). Lightly mist the dough with water, slide the parchment onto the hot baking sheet, and add ice cubes to the bottom pan for steam. Close the oven door quickly, then bake for 20 to 22 minutes, or up to 25 minutes for a deeper color. The internal temperature should reach 205 to 210°F (96 to 99°C). Finally, cool the rolls for at least 45 minutes before slicing so the inside sets properly.
Conclusion
These Rustic Homemade Ciabatta Bread Rolls bring together simple ingredients, patient rising, and a smart baking method for bread that feels bakery-worthy at home. Because of the biga, the rolls have better flavor, and because of the steam, they bake with a lovely crust. Plus, the soft, airy inside makes them useful for sandwiches, soups, and family meals.
If you try this Rustic Homemade Ciabatta Bread Rolls recipe, I would love to hear how it turned out. Leave a comment, share your tips, or save this post for your next bread-baking day. And if you enjoyed this one, take a look at more homemade bread recipes for your kitchen table.
Print
Rustic Homemade Ciabatta Bread Rolls
- Prep Time: 30 minutes
- Cook Time: 25 minutes
- Total Time: 820 minutes
- Yield: 8 rolls 1x
- Category: Bread
- Method: Baking
- Cuisine: Italian
- Diet: Vegetarian
Description
These ciabatta rolls feature a crisp crust and soft middle, made with simple ingredients and a special preferment for rich flavor.
Ingredients
- FOR THE BIGA (PREFERMENT):
- 1 cup (130 g) bread flour
- 1/8 tsp active dry or instant yeast
- 1/2 cup (120 ml) room-temperature water
- FOR THE DOUGH:
- 1 tsp (3 g) active dry or instant yeast
- 1 cup (240 ml) warm water
- 2 1/2 cups (325 g) bread flour, plus more as needed
- 1 1/2 tsp (8 g) table salt
- Olive oil, for coating hands and tools
- Extra flour, for dusting the work surface and tops of the rolls
- Ice cubes, for steam
Instructions
- Stir the biga flour, yeast, and room-temperature water together in a bowl. Then cover the bowl and let it rest at room temperature for 8 to 24 hours, until the mixture looks bubbly and active.
- Activate the yeast by stirring it into the warm water and letting it sit for 5 to 10 minutes until foamy.
- Add the biga, flour, and salt to the yeast mixture. Mix until you have a wet, sticky, uniform dough.
- Cover the bowl and let the dough rest for 30 minutes. Then, do the stretch-and-fold process four times with 30 minutes resting in between each round.
- Chill the dough for at least 1 hour and up to 24 hours. Then, turn the dough onto a floured surface and shape into rolls or loaves, resting for 1 hour.
- Heat the oven to 450°F (232°C) and bake the rolls for 20 to 25 minutes, adding ice cubes for steam and cooling for at least 45 minutes before slicing.
Notes
Use good quality bread flour for the best texture. Allow for proper resting times to achieve ideal results. Adjust yeast types and amounts if needed.
Nutrition
- Serving Size: 1 roll
- Calories: 233
- Sugar: 0g
- Sodium: 200mg
- Fat: 1g
- Saturated Fat: 0g
- Unsaturated Fat: 1g
- Trans Fat: 0g
- Carbohydrates: 48g
- Fiber: 2g
- Protein: 7g
- Cholesterol: 0mg
