
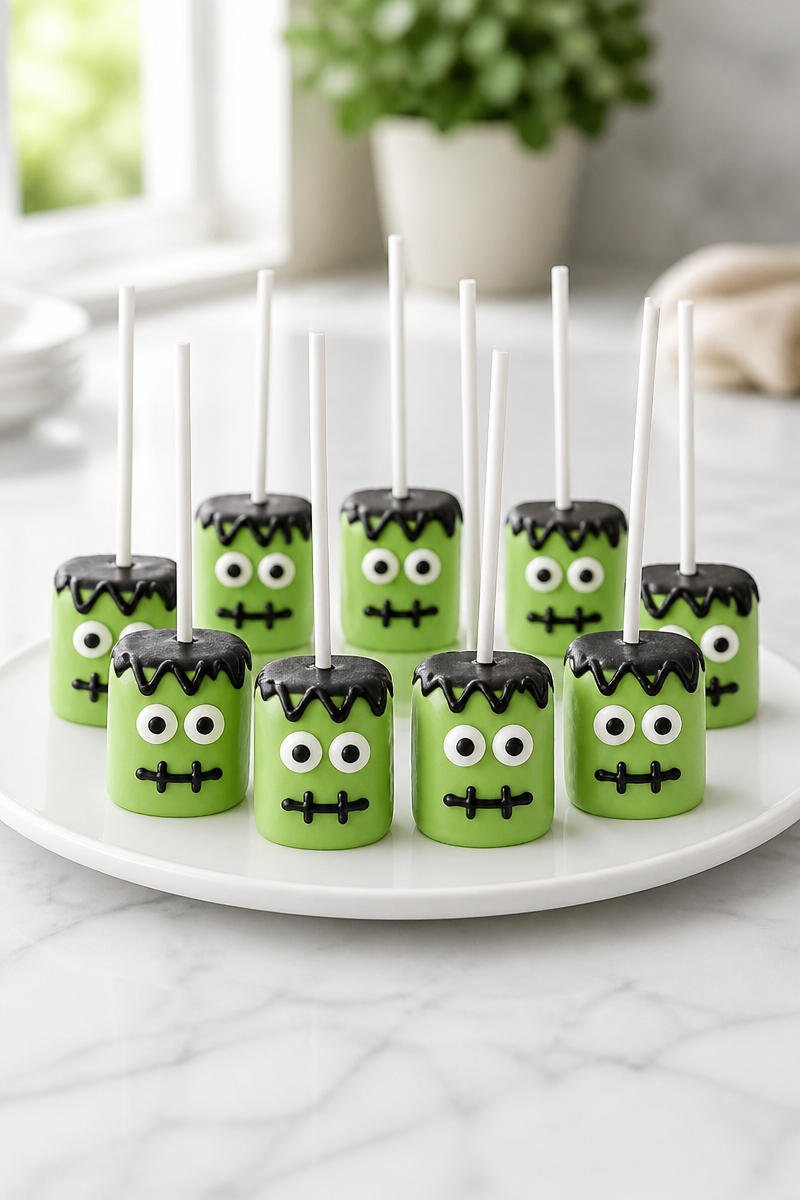
There’s something special about creating treats that capture the imagination, especially when they’re as fun and festive as Spooky Frankenstein Marshmallow Pops. The moment I saw these delightful, green, monster-themed goodies, I knew they would be the perfect project to bond over with family. They evoke memories of childhood creativity and bring a smile to faces of all ages. Whether you’re cooking with grandchildren or indulging by yourself, there’s a warmth in making treats that also turn into cheerful decorations.
The key components of this recipe combine large marshmallows with vibrant green candy melts and chocolate candy melts. Using a black edible marker, we bring these marshmallow pops to life with funny little faces. Finished off with candy eyes on top of the green coating, these treats not only look great but also balance sweetness with a slightly creamy texture. They are fun to eat and to look at, making them the perfect Halloween dessert!
Creating these fun pops is simple and straightforward. Start by inserting a popsicle stick into each marshmallow and melting the green candy melts. Dip the marshmallows in the melted candy until they are fully coated, then let them sit on wax paper to harden. Once set, you can use the black edible marker to add a whimsical mouth and some wild hair to your Frankenstein pops. Adding candy eyes with a touch of melted chocolate gives these spooky treats their personality. With each step, you will find that the process is engaging and not overly complicated.
These delightful Spooky Frankenstein Marshmallow Pops are perfect for potlucks or Halloween parties, where they can serve as both decorations and delicious treats. They’re also a great snack to enjoy on cool autumn evenings while sharing stories or watching a favorite movie. No matter the setting, these pops make gathering around the table a bit more festive and fun.
Why You’ll Love This Spooky Frankenstein Marshmallow Pop
- Quick: The entire process takes less than an hour, making this a great last-minute treat.
- Simple Ingredients: With only a handful of ingredients, these marshmallow pops are easy to gather.
- Comfort Food: Marshmallows dipped in candy melts are a hit with both kids and adults, fulfilling that sweet tooth.
- Creative Outlet: The chance to let your imagination run wild with decorating makes it a fun activity.
- Perfect for All Ages: Whether you’re young or young at heart, everyone can take part in the fun of creating and enjoying these pops.
Marshmallow Tips
When selecting large marshmallows, opt for the freshest ones you can find. Ensure they are soft and fluffy, as older marshmallows can become tough and chewy. Store your marshmallows in a cool, dry place and avoid exposure to air, as they can become hard. If you’re feeling adventurous, consider roasting the marshmallows over a fire to achieve a different flavor profile, though this may not suit the spooky theme as well.
Options for Substitutions
- Instead of large marshmallows, try using mini marshmallows for a bite-sized version.
- Substitute green candy melts with white chocolate or yogurt-covered melts for a different look and taste.
- Use regular chocolate chips if you want to skip the chocolate melts altogether.
- A food-safe ink pen can replace the black edible marker for drawing, but ensure it’s non-toxic.
- Wooden skewers work as an alternative to popsicle sticks for a sturdier option.
- Instead of candy eyes, consider using pieces of dark chocolate or even fondant for the eyes.
Watch Out for These Mistakes
When crafting your marshmallow pops, be mindful not to rush the melting process. Melting the green candy melts too quickly can cause them to seize or burn, impacting their glossy appearance. It’s best to melt them slowly in the microwave, stirring every 30 seconds until smooth.
When dipping the marshmallows, ensure they are fully coated but also shake off any excess candy melt. Too much coating can lead to a mess as it might run down the popsicle stick. After placing the coated marshmallows on wax paper, allow them ample time to harden completely. If you attempt to decorate them before they are set, the melted elements may smudge and ruin your design.
Finally, be careful when attaching the candy eyes. Using too much melted chocolate can cause the eyes to slide down the marshmallow, which can take away from the spooky look you’re going for. Use just a drop or two to adhere them securely.
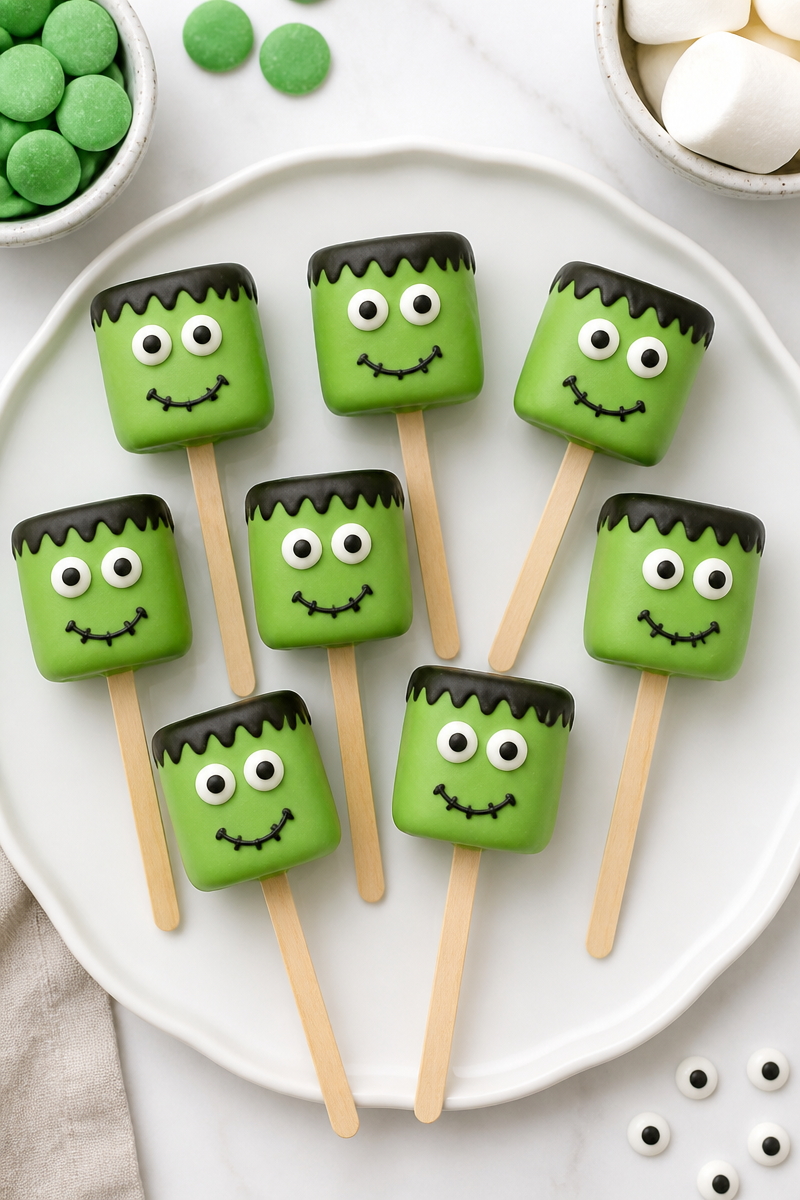
What to Serve With Spooky Frankenstein Marshmallow Pop?
These Spooky Frankenstein Marshmallow Pops pair wonderfully with a variety of treats. Consider serving them alongside a warm bowl of apple cider or a platter of caramel apples for an autumn-themed table. Additional snacks like popcorn balls or chocolate-dipped pretzels can complement the sweetness of the pops and create an inviting dessert spread. It’s a great way to add a little variety to your Halloween treats!
Storage Instructions
Store: Keep your marshmallow pops in an airtight container at room temperature. They should stay fresh for about 3 to 5 days.
Freeze: If you wish to save them longer, these pops can be frozen for up to 2 months. Just ensure they are in a freezer-safe container to prevent freezer burn.
Reheat: Normally, these marshmallow pops don’t require reheating. However, if you want to soften them slightly, place them in a warm spot for a few minutes. Avoid microwaving, as it can alter their texture.
Recipe Info
Preparation Time: Approximately 15 minutes.
Cooking Time: About 10 minutes for melting and setting.
Total Time: Roughly 25 minutes.
Level of Difficulty: Easy.
Servings: This recipe makes about 8-10 pops, depending on the size of your marshmallows.
Estimated Nutrition
Estimated nutrition for the whole recipe (without optional ingredients):
- Calories: 400-500
- Protein: 4-6 grams
- Fat: 20-25 grams
- Carbohydrates: 60-70 grams
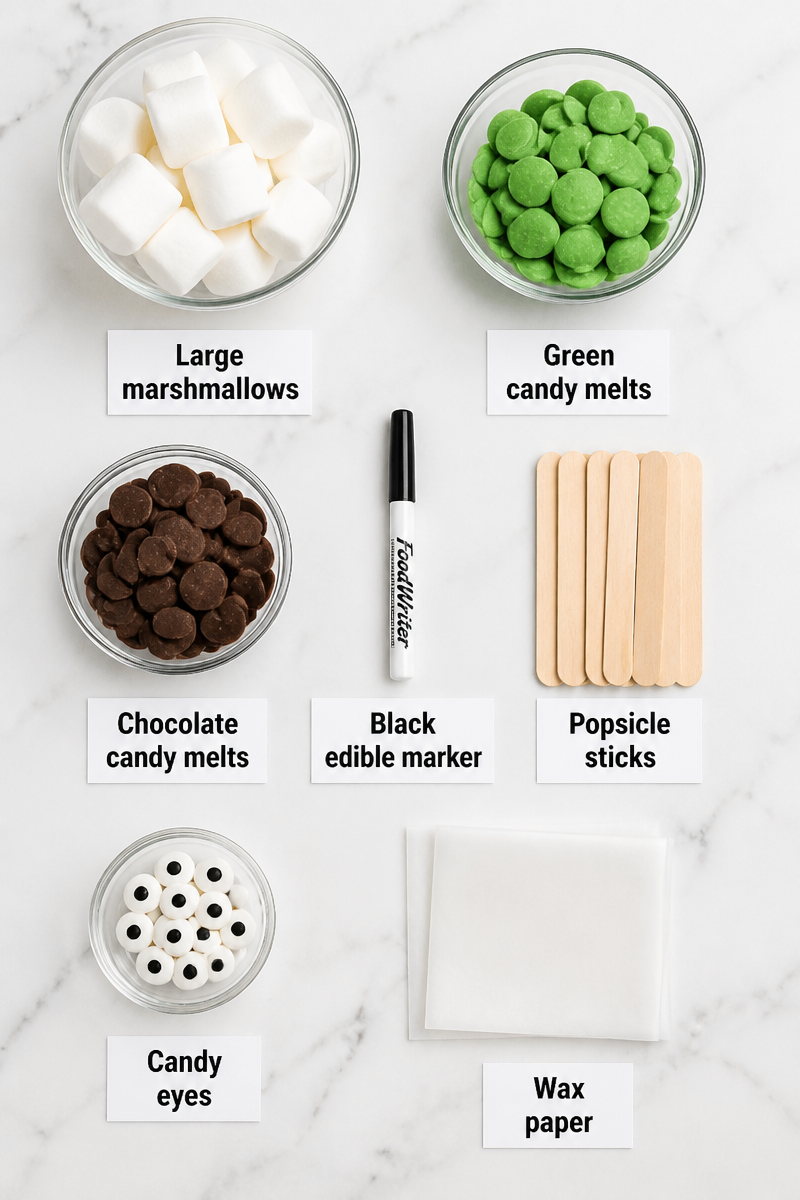
Ingredients
- Large marshmallows
- Green candy melts
- Chocolate candy melts
- Black edible marker
- Popsicle sticks
- Candy eyes
- Wax paper
Step-by-Step Instructions
Step 1: Insert Sticks into Marshmallows
Start by inserting a popsicle stick into the bottom of each large marshmallow. This will serve as the handle for your Frankenstein pops. Make sure not to push the stick all the way through; just enough to hold the marshmallow firmly.
Step 2: Melt the Green Candy Melts
In a microwave-safe bowl, melt your green candy melts. Heat them in short bursts of about 30 seconds, stirring in between, until smooth. Be careful not to overheat, as this can cause the candy to seize up.
Step 3: Dip the Marshmallows
Once the green candy melts are melted and smooth, dip each marshmallow into the candy. Rotate it around to ensure it’s thoroughly coated. Allow any excess candy to drip off before placing the marshmallow on wax paper.
Step 4: Let the Marshmallows Harden
Place your dipped marshmallows on the wax paper and let them sit at room temperature until the coating is completely hardened. This typically takes about 15-20 minutes.
Step 5: Decorate with the Black Edible Marker
Once the candy coating has set, take your black edible marker and draw a fun mouth and wild hair on each marshmallow. Get creative – each pop can have its unique character!
Step 6: Finish with Candy Eyes
Finally, use a small amount of melted chocolate (from your chocolate candy melts) to attach the candy eyes onto the marshmallows. Place them so that each pop has a quirky look, and then let set for a few minutes.
In conclusion, these Spooky Frankenstein Marshmallow Pops are not just a treat; they are a fun experience for everyone involved. Gather your loved ones, indulge in crafting these adorable treats, and share your feedback! I would love to hear how your spooky creations turn out, and this could be one of many delightful recipes for your home.
Print
Spooky Frankenstein Marshmallow Pops
- Prep Time: 15 minutes
- Cook Time: 10 minutes
- Total Time: 25 minutes
- Yield: 8-10 pops
- Category: Dessert
- Method: No-Bake
- Cuisine: American
- Diet: Vegetarian
Description
Delightfully fun and festive marshmallow pops decorated to look like Frankenstein, perfect for Halloween gatherings!
Ingredients
- Large marshmallows
- Green candy melts
- Chocolate candy melts
- Black edible marker
- Popsicle sticks
- Candy eyes
- Wax paper
Instructions
- Insert sticks into marshmallows. Start by inserting a popsicle stick into the bottom of each large marshmallow.
- Melt the green candy melts. In a microwave-safe bowl, melt your green candy melts in short bursts of about 30 seconds, stirring in between.
- Dip the marshmallows. Once the green candy melts are melted, dip each marshmallow, ensuring it’s thoroughly coated.
- Let the marshmallows harden. Place your dipped marshmallows on wax paper and let them sit until the coating is completely hardened, about 15-20 minutes.
- Decorate with the black edible marker. Draw a fun mouth and wild hair on each marshmallow for personality.
- Finish with candy eyes. Use melted chocolate to attach the candy eyes onto the marshmallows.
Notes
These pops can be stored in an airtight container for 3-5 days. For longer storage, freeze for up to 2 months.
Nutrition
- Serving Size: 1 pop
- Calories: 400
- Sugar: 40g
- Sodium: 100mg
- Fat: 20g
- Saturated Fat: 10g
- Unsaturated Fat: 5g
- Trans Fat: 0g
- Carbohydrates: 60g
- Fiber: 0g
- Protein: 6g
- Cholesterol: 0mg
