
Everyone has a dessert that brings them comfort, a treat that evokes fond memories of gatherings and celebrations. For me, that dessert is a classic no-bake cherry cheesecake. This delightful dessert reminds me of family get-togethers where laughter and stories flowed as freely as the sweet, creamy goodness of cheesecake. Each bite feels like a warm hug, making it a universally loved favorite, especially among seniors who often cherish homemade sweets from their younger days.
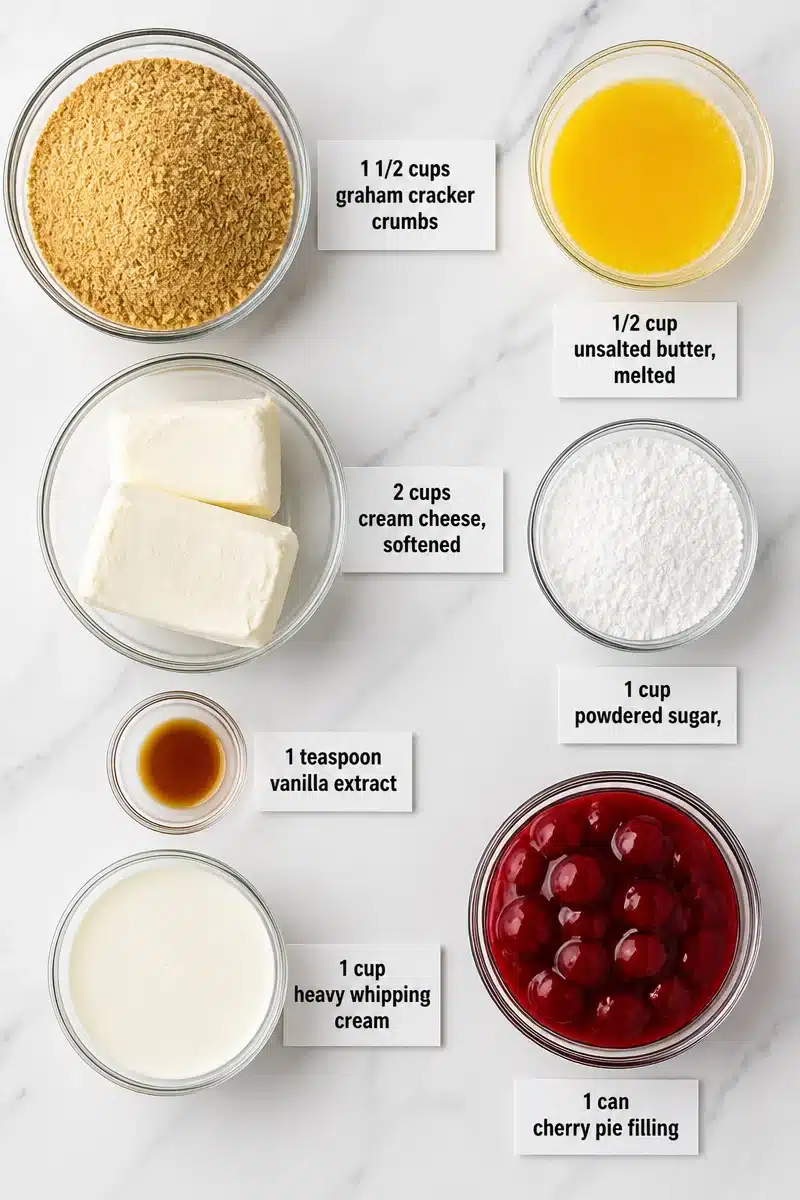
The beauty of this dessert lies in its simplicity. With just a few ingredients, we create something truly special. You’ll need 1 1/2 cups of graham cracker crumbs for the crust, combined with 1/2 cup of melted unsalted butter. The filling is a dreamy mixture of 2 cups of softened cream cheese, 1 cup of powdered sugar, and 1 teaspoon of vanilla extract. Finally, we fold in 1 cup of heavy whipping cream for that fluffy texture. Topping it all off is a can of cherry pie filling, which adds a pop of color and a burst of fruity flavor.
Making this cheesecake is straightforward and perfect for even beginner cooks. You start by mixing the graham cracker crumbs with melted butter to form the crust, followed by beating the cream cheese mixture until smooth. After whipping the cream, you mix it in and pour the filling over the crust. A few hours in the fridge for chilling and setting, and you’re ready to enjoy. It’s a fuss-free dessert that’s as delicious as it is impressive.
This no-bake cherry cheesecake is perfect for all occasions. Whether you’re hosting a summer barbecue or looking for a light dessert to finish off a cozy dinner, it never disappoints. It’s equally great for potlucks or just a sweet treat on a chilly night. There’s a certain joy that comes from sharing a slice with loved ones, making it a beloved recipe in many households.
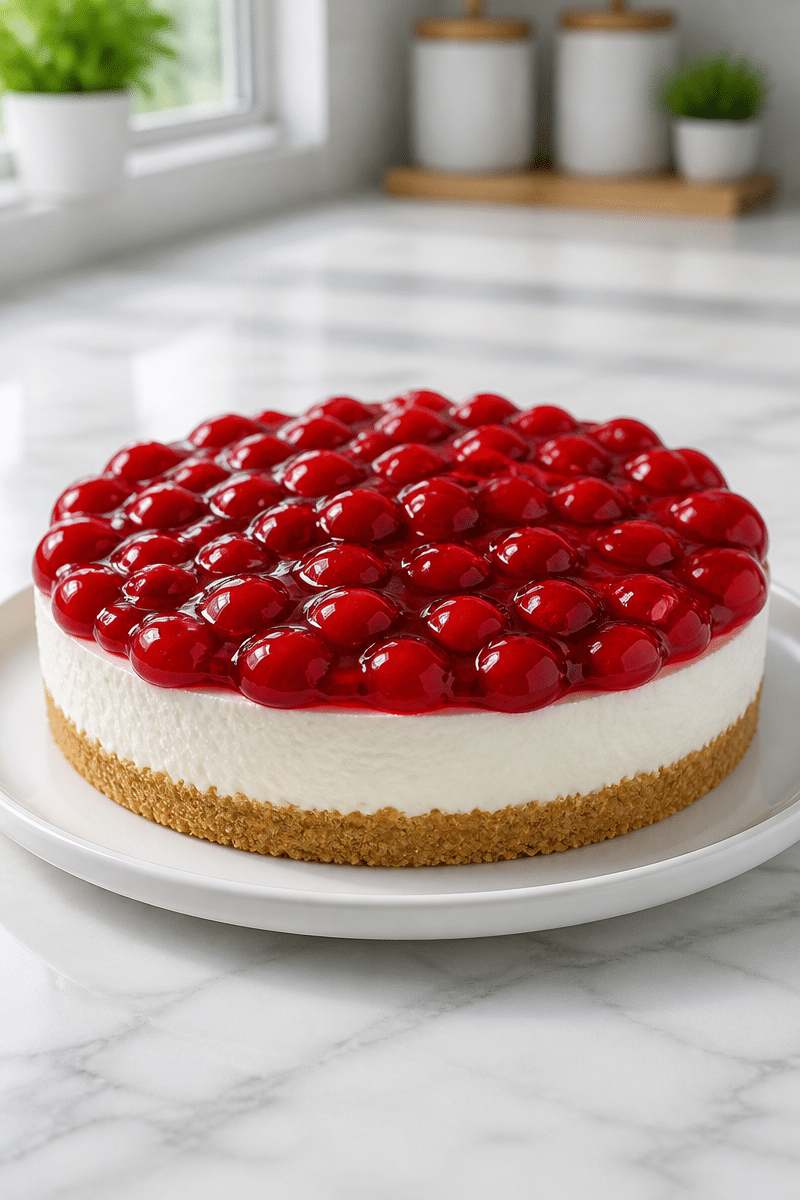
Why You’ll Love This Classic No Bake Cherry Cheesecake Dessert
- Quick Preparation: This dessert comes together in no time, with minimal baking involved.
- Simple Ingredients: You likely have many of these ingredients at home already, making it easy to whip up at a moment’s notice.
- Great for Any Occasion: Whether it’s a holiday, birthday, or just a regular Tuesday, this dessert fits right in.
- No Baking Required: Perfect for those warmer months when you want a delicious dessert without heating up the kitchen.
- Comfort Food: The combination of creamy filling and sweet cherries will always remind you of home and warmth.
Cream Cheese Tips
When it comes to any cheesecake, the star ingredient is undoubtedly the cream cheese. Selecting the right kind is key to achieving that smooth, creamy texture. Look for blocks of cream cheese rather than spreadable varieties. Block cream cheese has a higher fat content, resulting in a firmer texture that holds up beautifully in desserts. Always ensure it’s at room temperature before you start mixing. This will help you achieve that smooth consistency and blend seamlessly with the other ingredients.
Options for Substitutions
- Graham Cracker Crust: Use crushed vanilla wafers or even Oreos for a different flavor.
- Unsalted Butter: You can swap in coconut oil for a dairy-free version.
- Cream Cheese: Neufchâtel cheese is a lighter option that works well, too.
- Powdered Sugar: If you prefer less sweetness, consider using less powdered sugar or honey.
- Heavy Whipping Cream: Coconut cream can be a nice alternative for a lighter vegan option.
- Cherry Pie Filling: Fresh cherries or other fruits like blueberries or strawberries can make a delicious topping.
Watch Out for These Mistakes
Even a simple recipe like this can have its pitfalls. One common mistake is not allowing the cream cheese to soften to room temperature. If you mix cold cream cheese with the other ingredients, you’ll end up with lumps in your cheesecake, which can ruin the texture.
Another area where home cooks go wrong is overwhipping the heavy cream. When you whip it too long, it can turn grainy and curdled instead of airy and light. Always stop whipping when you see stiff peaks forming.
Lastly, don’t skip the chilling time. It’s tempting to dive right in, but allowing the cheesecake to chill for at least four hours helps it to set properly. If you cut into it too soon, you may end up with a soupy filling that doesn’t hold its shape.
What to Serve With Classic No Bake Cherry Cheesecake Dessert?
This classic cheesecake pairs wonderfully with a few side dishes. Consider serving it alongside a light fruit salad to complement the sweetness of the dessert. A scoop of vanilla ice cream can also elevate the experience, giving a delightful contrast in temperature and texture. For a bit of crunch, serve with some roasted nuts on the side. This combination will enhance the experience of enjoying your cheesecake.
Storage Instructions
Store: Keep leftovers in an airtight container in the refrigerator. It should be good for up to 4 days.
Freeze: This cheesecake can be frozen for up to 2 months. Wrap individual slices in plastic wrap and then place them in a freezer-safe container.
Reheat: For best results, let the cheesecake sit at room temperature until it softens slightly before serving. Avoid reheating in the microwave or oven, as it can affect the texture.
Recipe Info
- Preparation Time: 20 minutes
- Cooking Time: 0 minutes
- Total Time: 4 hours 20 minutes (includes chilling time)
- Level of Difficulty: Easy
- Servings: Approximately 8 servings
Estimated Nutrition
Estimated nutrition for the whole recipe (without optional ingredients):
- Calories: 2,000 – 2,400
- Protein: 20 – 25g
- Fat: 150 – 180g
- Carbohydrates: 200 – 220g
Ingredients
- 1 1/2 cups graham cracker crumbs
- 1/2 cup unsalted butter, melted
- 2 cups cream cheese, softened
- 1 cup powdered sugar
- 1 teaspoon vanilla extract
- 1 cup heavy whipping cream
- 1 can cherry pie filling
Step-by-Step Instructions
Step 1: Prepare the Crust
In a mixing bowl, combine the graham cracker crumbs and melted butter. Stir until the crumbs are evenly coated. Press this mixture into the bottom of a 9-inch springform pan to form the crust. Make sure it’s packed tightly so it holds together.
Step 2: Mix the Cream Cheese Filling
In another bowl, beat the softened cream cheese with powdered sugar and vanilla extract until smooth and creamy. This step is crucial for achieving a lump-free filling.
Step 3: Whip the Cream
In a separate bowl, whip the heavy cream until stiff peaks form. Be careful not to overmix, as this can change the texture.
Step 4: Combine and Spread the Filling
Gently fold the whipped cream into the cream cheese mixture until just combined. Pour this filling over the crust in the springform pan and spread it evenly with a spatula.
Step 5: Chill Until Set
Cover the springform pan and place it in the refrigerator. Allow it to chill for at least 4 hours, or until set. This step is key for a firm cheesecake.
Step 6: Add the Cherry Topping
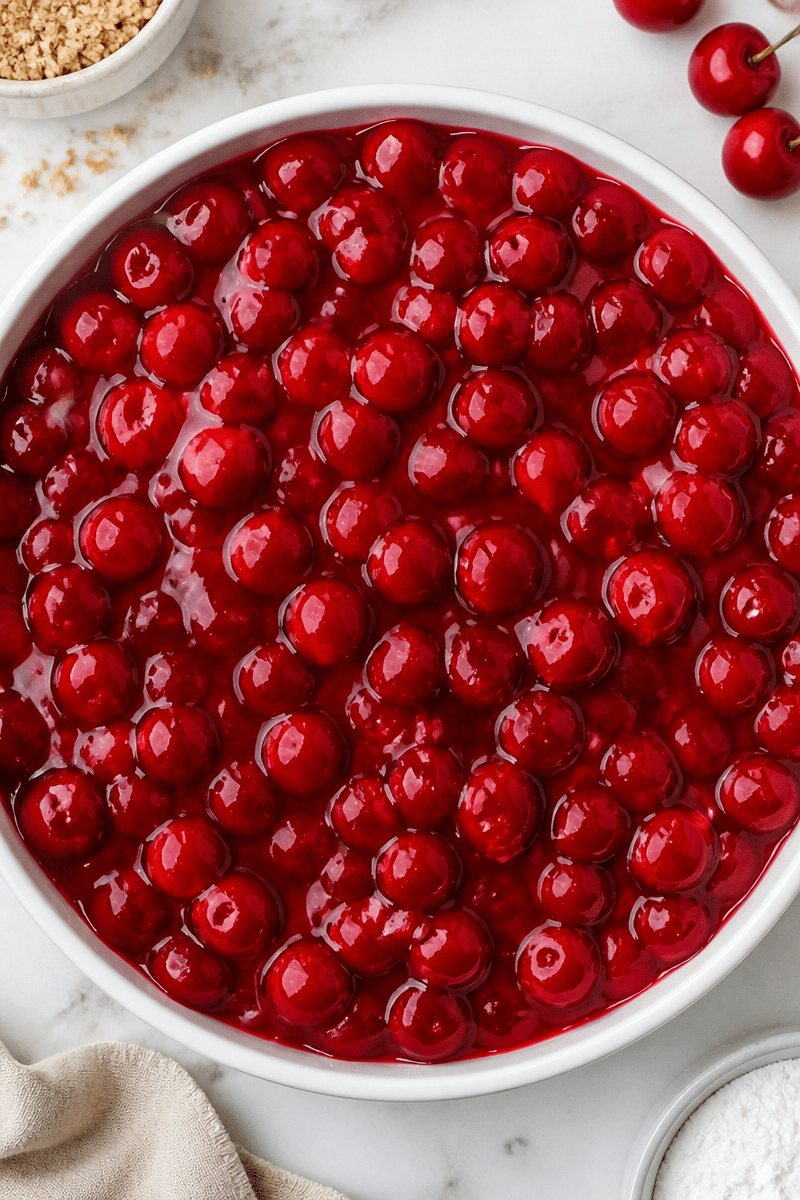
Once set, remove the cheesecake from the springform pan and spread the cherry pie filling evenly over the top. Cut into slices and serve!
In conclusion, this classic no-bake cherry cheesecake is not just a dessert; it’s a way to bring people together. The creamy filling, combined with the crisp crust and sweet cherries, offers a taste of nostalgia and comfort. I invite you to try this recipe, share your thoughts, and explore more delightful desserts on this blog. Your kitchen adventures are waiting!
Print
Classic No-Bake Cherry Cheesecake
- Prep Time: 20 minutes
- Cook Time: 0 minutes
- Total Time: 260 minutes
- Yield: 8 servings 1x
- Category: Dessert
- Method: No-Bake
- Cuisine: American
- Diet: Vegetarian
Description
A delightful no-bake cherry cheesecake that evokes sweet memories and brings comfort to all occasions.
Ingredients
- 1 1/2 cups graham cracker crumbs
- 1/2 cup unsalted butter, melted
- 2 cups cream cheese, softened
- 1 cup powdered sugar
- 1 teaspoon vanilla extract
- 1 cup heavy whipping cream
- 1 can cherry pie filling
Instructions
- Prepare the crust: In a mixing bowl, combine the graham cracker crumbs and melted butter. Stir until the crumbs are evenly coated. Press this mixture into the bottom of a 9-inch springform pan to form the crust.
- Mix the cream cheese filling: In another bowl, beat the softened cream cheese with powdered sugar and vanilla extract until smooth and creamy.
- Whip the cream: In a separate bowl, whip the heavy cream until stiff peaks form.
- Combine and spread the filling: Gently fold the whipped cream into the cream cheese mixture until just combined. Pour this filling over the crust in the springform pan and spread it evenly.
- Chill until set: Cover the springform pan and place it in the refrigerator for at least 4 hours.
- Add the cherry topping: Once set, remove the cheesecake from the springform pan and spread the cherry pie filling evenly over the top. Cut into slices and serve!
Notes
For a different flavor, consider using crushed vanilla wafers or Oreos for the crust.
Nutrition
- Serving Size: 1 slice
- Calories: 250
- Sugar: 22g
- Sodium: 200mg
- Fat: 18g
- Saturated Fat: 10g
- Unsaturated Fat: 8g
- Trans Fat: 0g
- Carbohydrates: 25g
- Fiber: 1g
- Protein: 4g
- Cholesterol: 30mg
